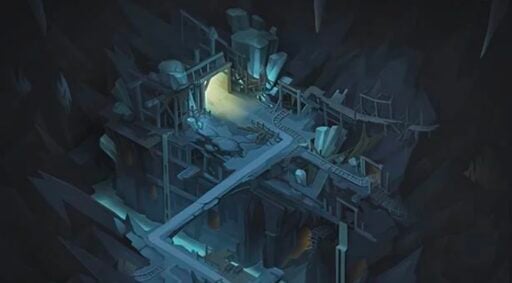

Congratulations on unlocking Dismal Descent, the 10th realm in Peaks of Time. Here you will find a full walkthrough through the whole realm from start to end to complete this realm as fast as possible
Recommended Hero Levels: 180-200+*
*the balancing of this realm can sometimes be really broken. Some did it with a team of 160-180 heroes while others failed with a team including ascended heroes.
If you want to clean the Dismal Descent you want to make sure that you pick the right order or you will stand with your head against a wall because you run into enemies that you would need more relics for.
The main part of my guide here is to show you the easiest path in terms of fighting the easier enemies first and then slowly getting to the harder ones when you collected the relics from the easier ones. In my opinion the hardest part in this Peaks of Time realm with tons of portals in it.
If you have troubles with your team, please refer to my frequently updated guide on the best teams in AFK Arena here or the tier list of the best heroes (including their best build). Also, don’t miss out on the recently new gift codes that I posted here.
So, without any further ado let’s jump right into the walkthrough.
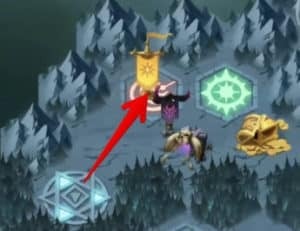
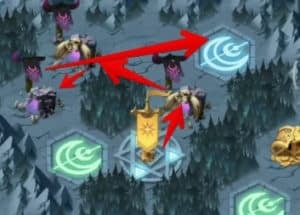
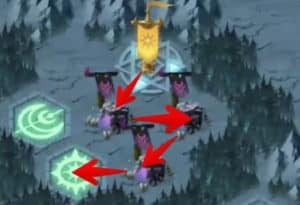
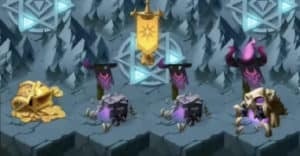
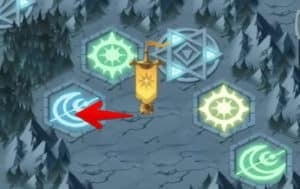
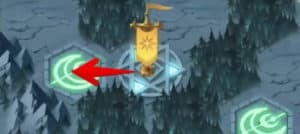
Step 1 – right after the start you have the choice of several different portals to take. Take the red portal at the bottom because this is the easiest path to take and the best way to collect some relics at the start.

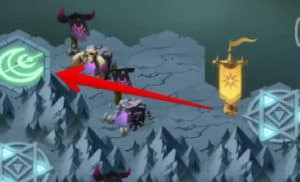
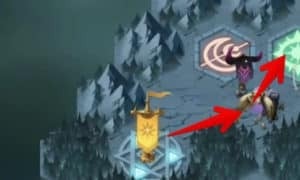
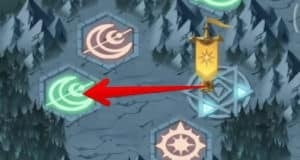
Step 2 – now you’re in the first section and you need to ignore the yellow portal and instead fight against all the enemy camps you have there. Do not skip the last camp as you don’t need it! You need the relic here and basically every single relic you can get to clear the Dismal Descent.

Once you have cleared these three camps you will go to the blue portal at the end.
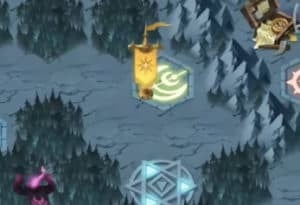
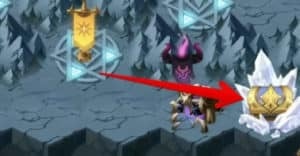
Step 3 – now you will find yourself in the top right corner section. This time you only fight the first camp and use the red portal – the elite camp in front of the chest is very likely too hard right now and we will get back to them later. Just ignore them for now.
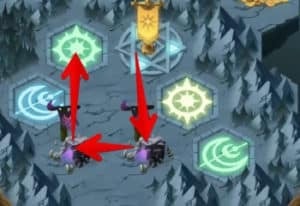
Step 4 – now you will find yourself in another small section where you have two camps and one portal. Again, you will clear both camps here to get the two relics and after you’re finished with that you use the green portal and will get back to the center section of the map where you started.

Step 5 – now you use the blue portal in the middle that will get you to the top right section of the map. Here you will find three normal enemy camps that you should again clear completely before using the green portal stone at the end of that section.
The boss fight at the end can be tough so maybe you need to do several attempts on him. After that you have the second green moon finished.
Step 6 – you’re again in the middle now and you will use the red portal again (Yes, the red one!). In the next section that you already entered right after the start you will now take the yellow portal instead of passing it.
Step 7 – you will now see yourself in front of a couple of camps that you have to fight through one by one. They are not crazy hard and the relics here will be very useful to strengthen your team for the next battles in the Dismal Descent.
At the end of this section you will find another green portal that will take you back to the center. You now have the third moon completed.

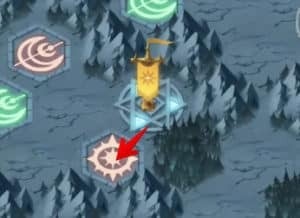
Step 8 – again, in the middle you are… I know it feels disappointing but this is how the Dismal Descent works. Now you take the yellow portal
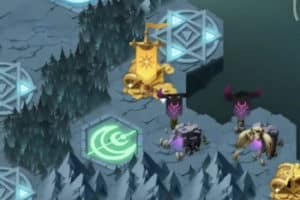
In the next section (s. image) you will first fight the elite camp and then the two other camps to get their relics. After that, you need to take the blue portal
Step 9 – Here you will find one single camp and several portals. Fight the camp (you don’t have any other option anyway), take the relic and then use the upper red moon portal.
Step 10 – Now you will find yourself again in front of a couple of normal camps with enemies that you need to fight through. At the end of that path, you will find a green portal that you need to use, now you have the fourth green moon and…. suprise… find yourself in the center again. Everything is alright until here 🙂
Step 11 – now you go from the center to the yellow portal and then in the blue portal and you will find yourself in the same section as you did in Step 9. This time you will take the red portal at the bottom and you will get to a new section.
Step 12 – Here you will find again three regular camps that you need to complete to get all the relics. After that, you need to use the lower green portal that will get you to another new section in the Dismal Descent map.
Step 13 – In this new section, you will see a lot of portals along with two camps. Do clear the two camps carefully and don’t step on any portal now 🙂 The two fights should be quite easy by now and will give you two more relics. After you cleared the relics you need to use the upper green portal.
Step 14 – time for some rewards now 🙂 In this new section you will find yourself you will find some camps and chests as well. The rewards are not the biggest fishes in the sea but finally at least some reward, right?
Clear the camps, claim the relics and get the chests and then use the only portal there (the green one).
Step 15 – you will now find yourself again in the center and got the fifth moon done. Go from the center to the yellow portal again and then in the blue portal and you will find yourself in the same section as you did in Step 9 and Step 11.
From here you will use the lower red portal again and you will get to the section that you cleared in Step 12. From here the lower green portal again that will get you to the section you cleared in Step 13. Here you will then use the yellow portal.
Step 16 – here you will see a ton of chests and regular camps as well as one boss fight. Do go left and do the normal camps and do NOT do the boss fight and the regular camp in front of it (you will need that later to charge all your heroes’ energy bars.
At the end of the line to the left you will find a green portal that you use that will get you back to the center (yes, leave the boss fight and the camp in front of it as it is for now!). Do use the last one on the left side to also fill up your energy bars because the next fight will be a bit nasty.
Step 17 – you now have the sixth green moon done and find yourself in the center again. Now you go from the center to the yellow portal again and then in the blue portal and you will find yourself in the same section as you did in Step 15. In this section then you will go through the left blue portal.
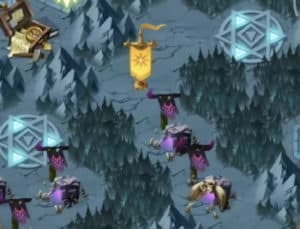
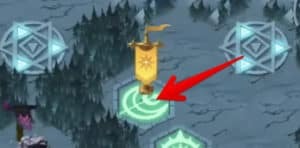
Step 18 – you will find yourself in this section that you can see in the image. This is the first nasty fight in the Dismal Descent and hopefull you used the last camp in Step 16 to charge all energy bars, you will need it.

Do the fight and re-run the fight as often as you need to without losing a hero. After that use the green portal at the end of that section.
Step 19 – you’re now back in the center (I know, annoying…) but maybe the fact that you just did the 8th moon will help… Use the red portal now again and in the following section the blue portal, like in Step 2. This will get you to the section in the top where you skipped the elite fight in Step 3.
Now you will do this fight and you’re strong enough. Do the fight and then use the green portal. After that follow the following section and use the green portal again to get back to the center.
Step 20 – it’s time to clear another boss fight that you left. Follow the path from Step 15 and you will find yourself again in the bottom boss section. Use the camp now to fill your heroes’ energy bars and then do the boss fight. After that fight go to the left (after you collect the Crystal Chest, of course) and use the green portal again to get to the center.
Step 21 – it’s time to get the 10th moon done by using the yellow portal and then the green portal in the next section. Actually an easy step without much walking or any fighting.
Step 22 – time for the 11th moon (I know, it sucks). Go into the yellow portal again in the center and then into the blue portal. In the following section you will go into the green portal. Now you’re (again) in the center of the map. It’s important that you do these.
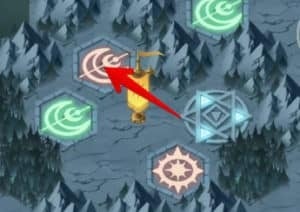
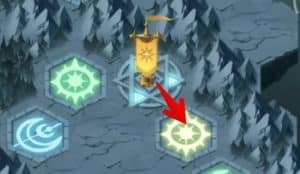
Step 23 – Now the last moon. After you’ve activated it any green portal will get you into the last section and the final boss and Crystal Chest. You’re in the center now and you take the yellow portal again and then the blue portal (same as Step 22) but then you take the lower red portal (see in the image).
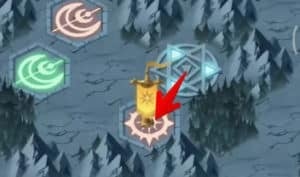
Now you take the upper green portal in this section that will take you back to the center. You now have all moons activated and you can get to the final boss by using any green portal that you find. Just take any random portal and get to the next green portal (yellow is fastest from the center)
Step 24 – Time to leave this horrible realm called Dismal Descent for good by beating the final boss. Follow the path and fight through the bosses. Done. You should have cleared the realm with 100% and be able to proceed to the next one, the Savage Wastes.