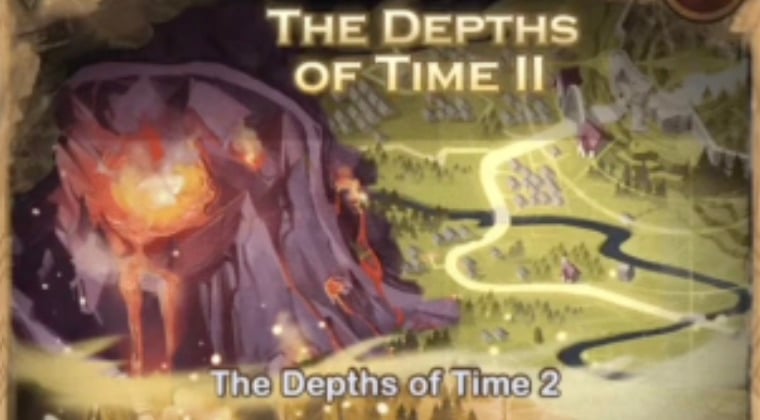
The Wandering Balloon let us re-play past Voyage of Wonders realms and the realm that just got added is The Depth of Time II, a really nice Voyage of Wonders we had back in June 2020 and it will be available in the Wandering Balloon starting March 12th, 2021. Many of us agree that this series was the best Voyage of Wonders with wandering between different times. And this very realm now has a new chapter with The Depths of Time 2, and I can promise you it’s again an interesting one!
As always, I have a step-by-step guide below that you can use to solve the realm below.
The Depths Of Time 2 General & Rewards
You will again travel between times with one side of the map showing the present and one showing the past – and actions on the “past” side of the map will change things in the “present” time.
Again, it’s about finding the right order to go through the map and not do some wrong steps that can block you out.
What’s The Reward In The Depths Of Time 2?
Now in the Wandering Balloon, the main rewards have changed a bit and you will get 1000x Diamonds as well as 10x Faction Scrolls from the Crystal Chests:

Along you will find plenty of Golden Chests with boosters, soul stones and emblems, too.
If you have troubles with your team, please refer to my frequently updated guide on the best teams in AFK Arena here or the tier list of the best heroes (including their best build). Also, don’t miss out on the recently new gift codes that I posted here.
The Depths Of Time Walkthrough
Without further ado, let’s jump right into the walkthrough where I show you step-by-step how to solve The Depths Of Time 2 and get the rewards.
Step 1 – you will face a boss right at the start and it’s a boss that’s you can’t beat but you will snipe it out of your way later 🙂
Go to the left and you will see a blue lever and when pulling it, you will see a portal appearing that you need to take to get to the left side of the map.

Here you need to follow the steps in the right order or you might get stuck or block your path on the right side of the map, so follow my steps.
Step 2 – also here you will see a boss on the right hand side that you will remove with a cannon.
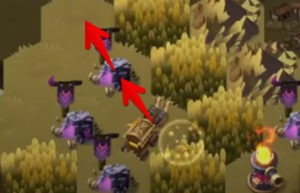
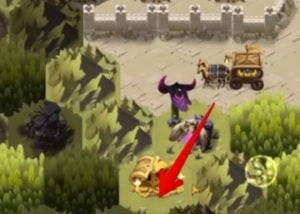
Go left and use the blue lever and go up where you find the first camps that you need to fight. Now you will see a Golden Chest right after the blue stone.
Step 3 – when picking up that Golden Chest, you will see camps appearing and you only need to fight one for now to get up north.
Do that fight and the camp behind when going up north until you reach the village there.
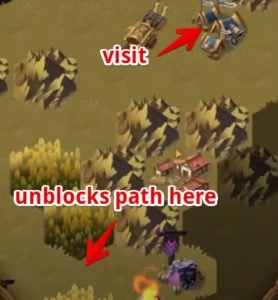
Step 4 – when you now do visit that village, you will see that it will unblock a path below to the cannon.
Go there and fire that cannon and you will see that the boss on the bottom side disappears and you can just like that pick up the first Crystal Chest.
Also it’s now time to clear off all the camps there to get more extra relics to get stronger.
Some camps can be tougher so always take the one with the lowest level enemies first, get the relic to get stronger and then subsequentially work through the camps in this section of the Depths of Time 2 map.
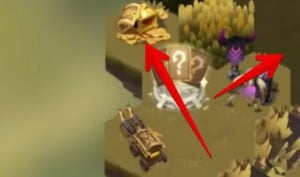
Attention – when you cleared the bottom section of the map and took all the camps down, you will see one innocent relic chest behind that village…
Do NOT take this chest! If you take this chest, it will block your path later on the right side of the map so keep it there!

Step 5 – now work your way up through the camps and get more relics to get stronger. There are a lot of Naras in the enemy team that can really annoy fighting, especially when they pick on your support heroes along with Thoran.
Sometimes you need to run the fights a few times to get them done but don’t lose any hero here, there’s no way to revive them later.
Step 6 – clean all the camps you can clear out here and collect all the Golden Chests as well but ignore everything else like cities and also that one cannon.
This will get used later so do not fire it now when you come through it.

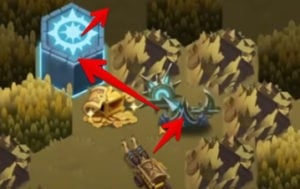
Step 7 – on top of the map you will 4 of these portals.
You need to click all of them to deactivate them, this will make the boss fight on top significantly easier and each portal you deactivate by clicking makes the enemies weaker.
Do fight all the camps there (except the boss) and click all 4 portals. There two next to the boss on top and two below behind camps.

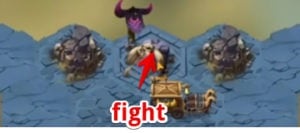
Step 8 – now it’s time to open a portal to the right side of the map and after you have deactivated all 4 portals this boss fight should not be a problem.
It’s kind of a nasty combination but with a team that has nice symbiosis you shouldn’t have much problems fighting that boss. After the fight you will see a portal appearing.
Step 9 – now go south on the right side of the map through the camps and collect the relics and Golden Chests on your path there.
Just follow that path down and collect everything until you reach the inactive cannon on the right side.
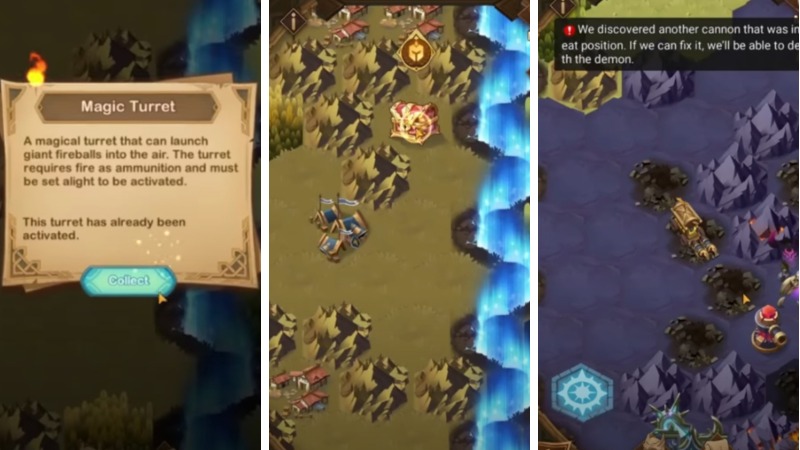
In the next step we now have to activate that cannon to get rid of a boss camp that is really hard to fight.
Step 10 – to do that, you need to walk back to the left side of the map and use the cannon in the middle there that says “collect”. This allows you to carry the arcane energy over to the other cannon. So you walk through the portal on top to the left side, use the cannon in the middle of the left side of the map, walk back through the portal on top and activate the cannon on the right side:
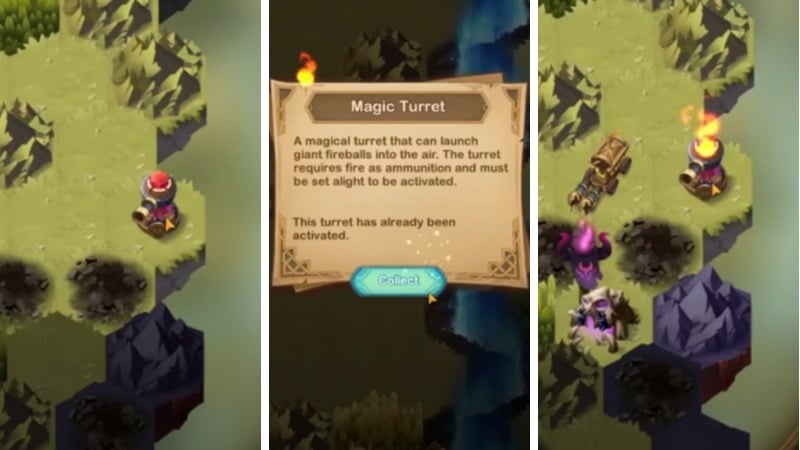
Now use the cannon that you just activated and that boss camp will disappear. This will be important later.
Now head to the left where you find more camps and Golden Chests.
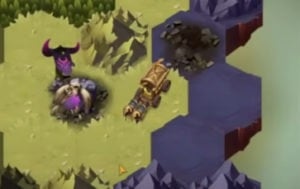
Step 10 – with that boss camps out of the way, you can now enter that bottom section of the right side of the map in The Depths of Time 2.
This camp you see int he image is optional, if you can beat it without losing any hero you can go for the extra relic. If not, you can ignore that camp, up to you, and follow the path further down.
Step 11 – when following the route (the fight with Isabella, Mezoth and Thoran can be really annoying, re-run it as long as you need until you get it done), you will get the second Crystal Chest.
If you took the relic at Step 4, that I highly recommended you to NOT take, you would block that.
Step 12 – now it’s time for another trip to the left side of the map where you can collect that relic now that you have the Crystal Chest and also pick up more arcane essence to activate another cannon.
Go through the portal on top once more, collect that relic from Step 4, collect the arcane power from the cannon in the middle once more and go back to the right side of the map.
Here you follow the path until you find the inactive cannon and use the arcane essence to activate it like you did with the cannon above.
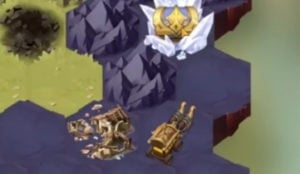
Step 13 – now shoot the cannon and it will tell you that it hasn’t enough power. Now you need to take the portal at the bottom and go the the left side another time and pick up more arcane power from the bottom cannon there. It will tell you that it’s enough power now.

To get back, you need to now go to the portal on top of the left side of the map to get back to the right side and walk back to the cannon at the bottom of the right side. This will take out the camp with the 5x Mezoth and you can collect the last Crystal Chest and clear out every left Golden Chest to be done with the Depths of Time 2.
Don’t stop here… the next Wandering Balloon is already waiting with more rewards! See here the full walkthrough for The Echoing Valley.