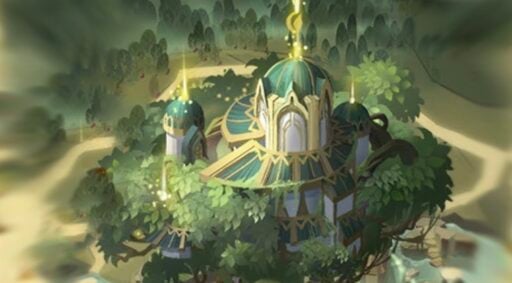
The Wandering Balloon let us re-play past Voyage of Wonders realms and the realm that just got added is Deathly Marshlands, a really nice Voyage of Wonders we had back in November 2020 and it will be available in the Wandering Balloon starting December 19th, 2021. I have re-worked this guide now that it’s part of the Wandering Balloon. As always, I have a step-by-step guide below that you can use to solve the realm.
As always, I have a step-by-step guide below that you can use to solve the realm below.
Deathly Marshlands General & Rewards
You might remember the valves that you can turn to give light paths the right direction from various other realms, right? Well, they are back and again you need to get the lines in place to activate the crystals to find your final path through the realm and to the final Crystal Chest.
When the Deathly Marshlands have been up in Voyage of Wonders, there has been a hero choice chest and some Soulstones, but the rewards adapted now that it’s inside Wandering Balloon:
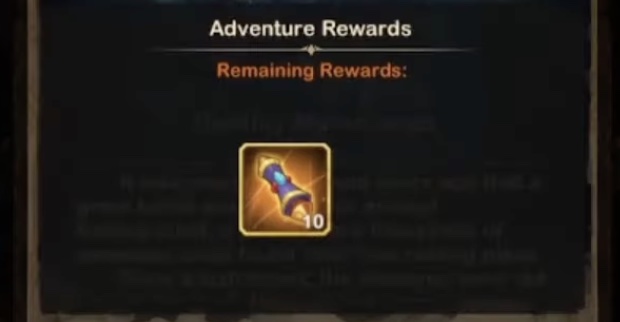
It’s more ‘basic’ rewards but I think everyone can use some boosters, emblems, coins and more – and also the 10x Faction Summon Scrolls aren’t that bad, right?
If you have troubles with your team, please refer to my frequently updated guide on the best teams in AFK Arena here or the tier list of the best heroes (including their best build). Also, don’t miss out on the recently new gift codes that I posted here.
Deathly Marshlands Walkthrough
Without wasting any more time, let’s jump right into the step-by-step guide for the Deathly Marshlands 🙂
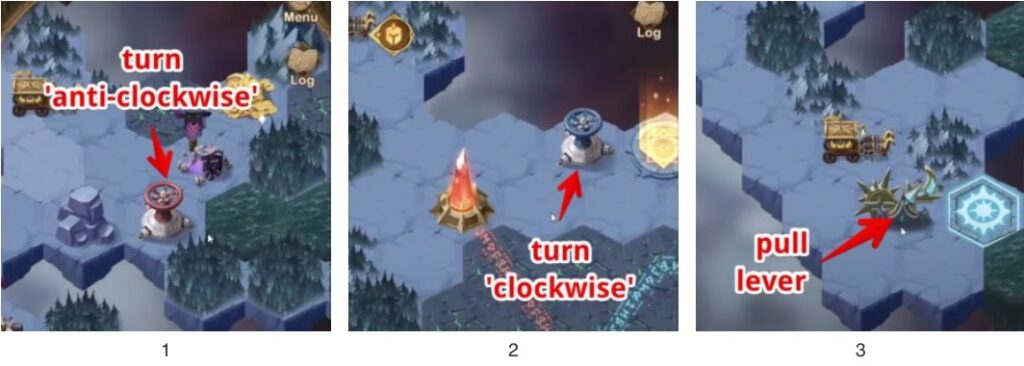
Step 1 – right at the start you will find the first valve that you need to turn 1x counterclockwise (left button) (1). This will activate the crystal to the right of your position. Now fight the camp next to the valve as well and go to the right direction of the map where you will find another camp that you need to fight.
Now follow the path to the very right side of the map where you will find a blue valve (2). Use this valve 1x clockwise (right button) and you will activate the crystal right next to your position. Follow the path to the bottom direction, there you will find a blue lever that you need to use once (3) so the blue stone next to it is in the elevated position.
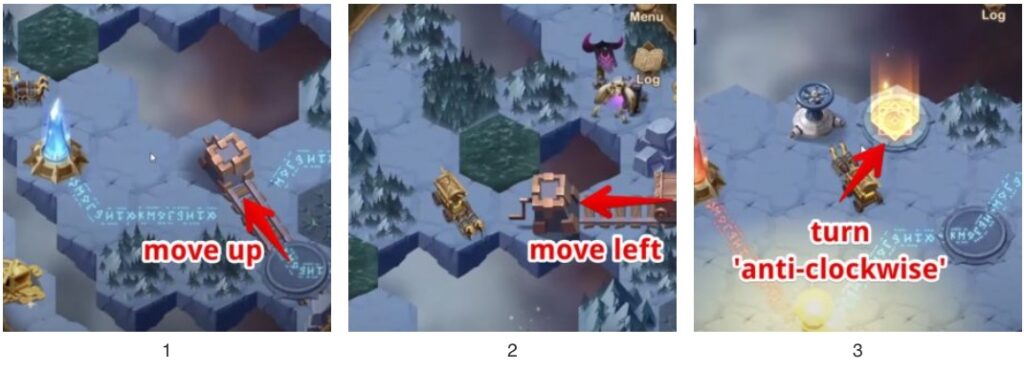
Step 2 – after that, follow the path to the right direction where you will find a turntable on tracks that you need to move to the upper position (1). Walk back to the crystal section that you have been in Step 1 and then to the bottom where you will find another railway with a cart in it that you need to move to the left position (2).
Then go back to the blue valve you have used in Step 2 and use it 1x anti-clockwise (3).
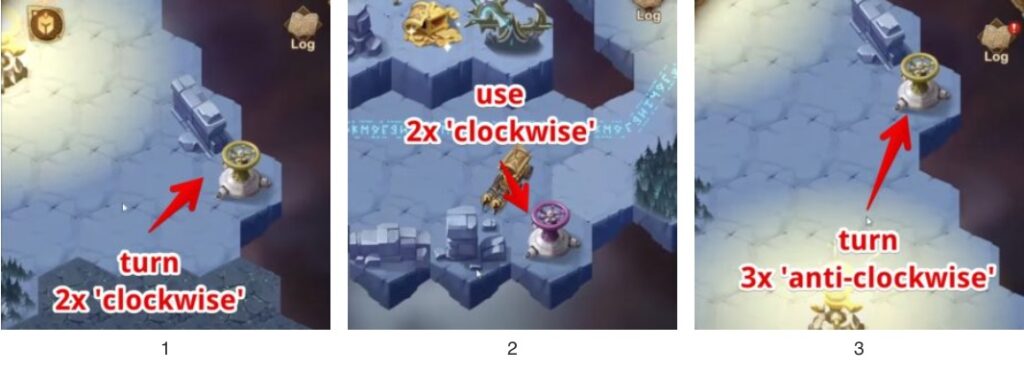
Step 3 – go to the position where the crystal just got activated (you will have to take the right path and fight the camps there), you will find a yellow valve there. Use that valve 2x clockwise (1). This will activate the bottom right crystal on the map of the Deathly Marshlands.
Now go to the bottom area of the map where you will find a purple valve (2) – use that purple valve 2x clockwise (right button) as well. Then go back to the yellow valve (3) and use the yellow valve and use it 3x counterclockwise (left button).
Step 4 – you have every set up perfectly in that area. Go back to the blue lever from Step 3 and use the blue lever once (1). At this point you will see the crystal on the elevated area getting activated. Get on the upper floor by stepping on the blue stone and then using the blue lever again. Then clear up the two camps that you have up there.
Go to the right side next to the portal and use the blue lever there (2), this will activate the crystal again. After having done that, go to the green valve and use it 2x clockwise (3).
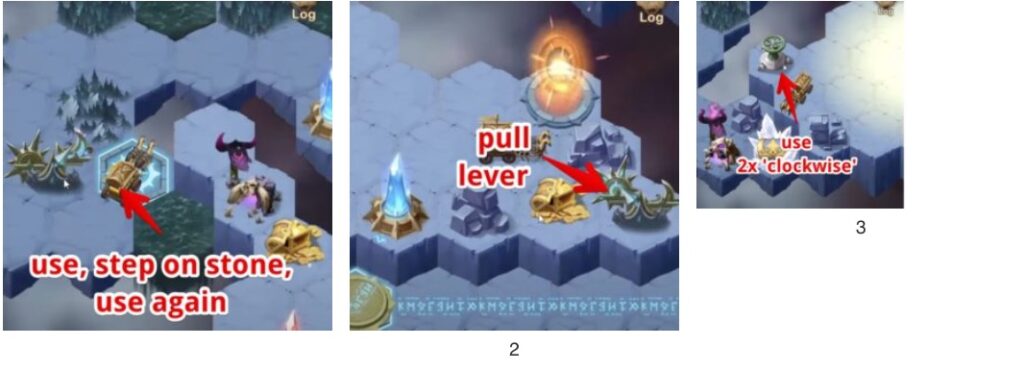
Step 5 – use the blue lever again (1) after you have used the green valve. Then use the portal to get back to the ground level.
Then go to the yellow valve and use it 3x clockwise (2) and the purple valve and use it 1x clockwise (3).
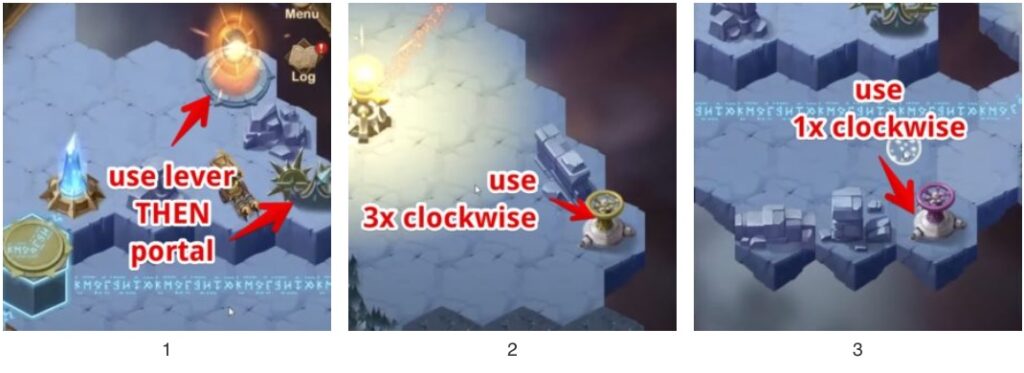
Now you’re all set and can fight through the remaining camps to get the final relics before you can do the final boss fight at the bottom of the map and you’re done with the Deathly Marshlands and can enjoy the rewards 🙂
Don’t stop here… the next Wandering Balloon is already waiting with more rewards! See here the full walkthrough for Bridge of Souls.
 and then
