

F1 has a stop in Singapore this weekend for the official Grand Prix and as always, we have the full guide here for you to make sure you finish well in the points. By the way, in our guide we also calculate the stat boost for Ocon, The Sabre and Pivot in! There has been some questions recently if we do account for the temporary stats boost and yes, we do that 🙂
By the way, don’t forget that we have just finished updating our guides for the series in 2025 – check out Series 3 here, Series 4 here, Series 5 here, Series 6 here, Series 7 here, Series 8 here, Series 9 here, Series 10 here, Series 11 here and Series 12 here.
⚠️ IMPORTANT ⚠️
Please mind that this is the guide for the Challenger Class – if you’re not taking part in the Challenger Class, here are the guides for Junior Class, Contender Class and Champion Class
Event Overview
The races are done all in the same conditions and setups, no matter what day. The races you have on the Qualifying Day are exactly the same you have in the Opening Round and in the Final Round, including the weather conditions. Use the links here to jump to the race.

QUALIFYING ROUND:
- 🇸🇬☀️ Singapore – Click here
- 🇺🇸☀️ Miami – Click here
- 🇨🇳💧 Shanghai – Click here
- 🇲🇽⛅️ Mexico City – Click here PRO
OPENING/FINAL ROUND:
- 🇸🇬☀️ Singapore – Click here
- 🇮🇹⛅️ Imola – Click here
- 🇺🇸☀️ Miami – Click here
- 🇦🇪☀️ Abu Dhabi – Click here PRO
- 🇨🇳💧 Shanghai – Click here
- 🇦🇺⛅️ Melbourne – Click here PRO
- 🇲🇽⛅️ Mexico City – Click here PRO
- 🇸🇬☀️ Singapore – Click here
Remember, you can change your car/driver setup for each race and you should – this means you will get the ideal setup for each single one to make sure you land the best prices at the end of the final round of the event.
Unlike regular series races where you don’t know the exact track to come, events will let you know exactly what track you’re on so you have to adapt your car/driver setup BEFORE every race for the best results!
Qualifying Round Strategy
🇸🇬 Singapore Setup




The ideal car setup for this race in the event is:
- Brakes: Supernova
- Gearbox: Slickshift
- Rear Wing: The Spire
- Front Wing: Vortex
- Suspension: Equinox
- Engine: The Reactor
And for the drivers:


And this is the pit stop strategy and tires you should use





This track is so rough on the tires and to prevent stacking send one driver on a 2-stop on medium tires (Attention: soft tires will not last 2 laps here!!!!) and the other one slow cruising on a 1-stop on hard tires. This is the best strategy also to make sure at least one driver ends up high in the points
🇺🇸 Miami Setup


The ideal car setup for this race in the event is:
- Brakes: Supernova
- Gearbox: Fury
- Rear Wing: X-Hale
- Front Wing: Vortex
- Suspension: Curver 2-5
- Engine: Spark-E
And for the drivers:


And this is the pit stop strategy and tires you should use


There is not much you can do here other than a 1-stop with medium tires. Everything else will fall behind or is super risky/depending on the situation. The only case is a Safety Car early you can maybe try to stretch one drivers tires to 4 laps and then use soft tires but that is very rare to happen
🇨🇳 Shanghai Setup
The ideal car setup for this race in the event is:
- Brakes: Supernova
- Gearbox: Slickshift
- Rear Wing: The Spire
- Front Wing: Vortex
- Suspension: Equinox
- Engine: The Reactor
And for the drivers:


And this is the pit stop strategy and tires you should use

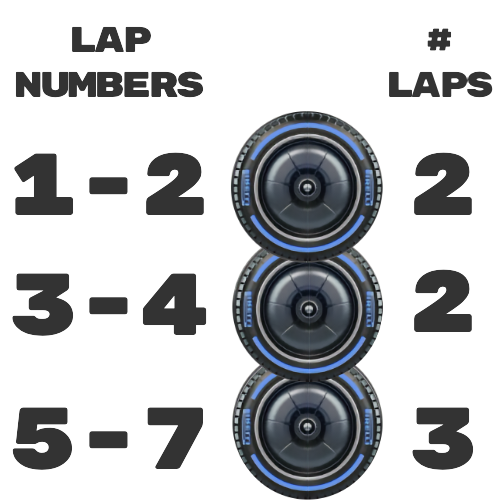
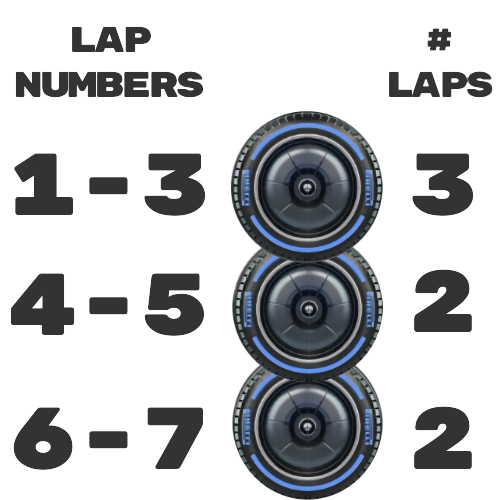
I don’t recommend the 1-stop here with the tires since you can barely push. If you do use a booster with at least +10 Tyre Management you actually can do that well, though. Otherwise, fo with the comfortably 2-stop and be able to push
🇲🇽 Mexico City Setup
The ideal car setup for this race in the event is:
- Brakes: Supernova
- Gearbox: Slickshift
- Rear Wing: The Spire
- Front Wing: Vortex
- Suspension: Equinox
- Engine: The Reactor
And for the drivers:
And this is the pit stop strategy and tires you should use


Unlock all 4 sections Hide plans
Opening/Final Round Strategy
🇸🇬 Singapore Setup
The ideal car setup for this race in the event is:
- Brakes: Supernova
- Gearbox: Slickshift
- Rear Wing: The Spire
- Front Wing: Vortex
- Suspension: Equinox
- Engine: The Reactor
And for the drivers:
And this is the pit stop strategy and tires you should use
This track is so rough on the tires and to prevent stacking send one driver on a 2-stop on medium tires (Attention: soft tires will not last 2 laps here!!!!) and the other one slow cruising on a 1-stop on hard tires. This is the best strategy also to make sure at least one driver ends up high in the points
🇮🇹 Imola Setup
The ideal car setup for this race in the event is:
- Brakes: Supernova
- Gearbox: Slickshift
- Rear Wing: The Spire
- Front Wing: Vortex
- Suspension: Equinox
- Engine: The Reactor
And for the drivers:
And this is the pit stop strategy and tires you should use


Just like the first race in the event… Driver 1 can push a bit early on and then through the pit zone area to overtake the cars there but most of the time literally will cruise. Since the track will normally not let you pull away quickly and you don’t want to stack your drivers in pit stops you need different stop strategies so the other driver has to go on the 234 lap setup or you will lose a lot of time in the pit stop.
🇺🇸 Miami Setup
The ideal car setup for this race in the event is:
- Brakes: Supernova
- Gearbox: Fury
- Rear Wing: X-Hale
- Front Wing: Vortex
- Suspension: Curver 2-5
- Engine: Spark-E
And for the drivers:
And this is the pit stop strategy and tires you should use
There is not much you can do here other than a 1-stop with medium tires. Everything else will fall behind or is super risky/depending on the situation. The only case is a Safety Car early you can maybe try to stretch one drivers tires to 4 laps and then use soft tires but that is very rare to happen
🇦🇪 Abu Dhabi Setup
The ideal car setup for this race in the event is:
- Brakes: Supernova
- Gearbox: Slickshift
- Rear Wing: The Spire
- Front Wing: Vortex
- Suspension: Equinox
- Engine: The Reactor
And for the drivers:
And this is the pit stop strategy and tires you should use

Unlock all 4 sections Hide plans
🇨🇳 Shanghai Setup
The ideal car setup for this race in the event is:
- Brakes: Supernova
- Gearbox: Slickshift
- Rear Wing: The Spire
- Front Wing: Vortex
- Suspension: Equinox
- Engine: The Reactor
And for the drivers:
And this is the pit stop strategy and tires you should use
I don’t recommend the 1-stop here with the tires since you can barely push. If you do use a booster with at least +10 Tyre Management you actually can do that well, though. Otherwise, fo with the comfortably 2-stop and be able to push
🇦🇺 Melbourne Setup
The ideal car setup for this race in the event is:
- Brakes: Supernova
- Gearbox: Fury
- Rear Wing: X-Hale
- Front Wing: Vortex
- Suspension: Curver 2-5
- Engine: Spark-E
And for the drivers:
And this is the pit stop strategy and tires you should use
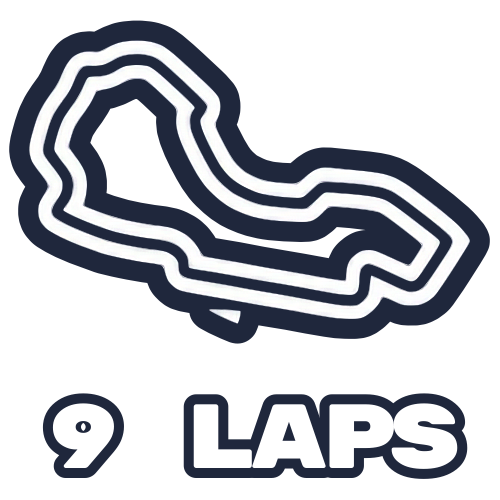
Unlock all 4 sections Hide plans
🇲🇽 Mexico City Setup
The ideal car setup for this race in the event is:
- Brakes: Supernova
- Gearbox: Slickshift
- Rear Wing: The Spire
- Front Wing: Vortex
- Suspension: Equinox
- Engine: The Reactor
And for the drivers:
And this is the pit stop strategy and tires you should use
Unlock all 4 sections Hide plans
🇸🇬 Singapore Setup
The ideal car setup for this race in the event is:
- Brakes: Supernova
- Gearbox: Slickshift
- Rear Wing: The Spire
- Front Wing: Vortex
- Suspension: Equinox
- Engine: The Reactor
And for the drivers:
And this is the pit stop strategy and tires you should use
For the last race here use the same strategy that you used in the first race to finish this round up well in the points.
 Keep AllClash one tap awayAdd it to your home screen and it opens full screen, like an app.