The Wandering Balloon let us re-play past Voyage of Wonders realms and the realm that just got added is The Forest’s Edge, a really nice Voyage of Wonders we had back in April 2020 and it will be available in the Wandering Balloon starting August 19th, 2020. The puzzles you need to solve aren’t that complicated and also the opponents are okay in my opinion without any hard one in there.
As always, I have a step-by-step guide below that you can use to solve the realm below.
The Forest’s Edge General & Rewards
The main objective in The Forest’s Edge is to actually solve the puzzles to reach the final boss fight. Fights itself aren’t that hard and if you know how to solve the puzzles you won’t have a hard time.
What’s The Reward In The Forest’s Edge?
Rewards have shifted a little since this realm is now available in the Wandering Balloon and the main reward now is 5x Faction Summon Scrolls:
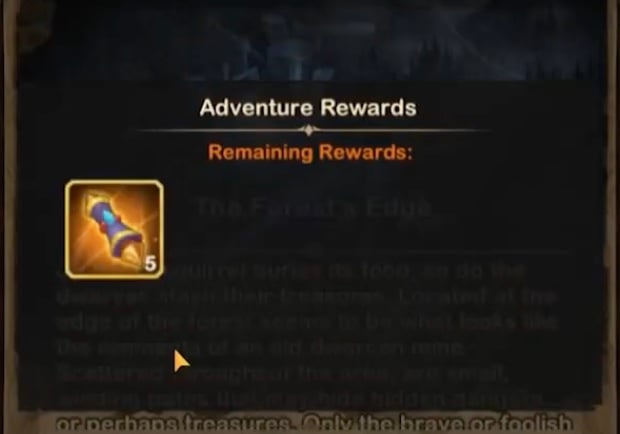
You will also get some minor rewards as usual from the Golden Chests.
But before losing it into the rewards you need to solve The Frozen Ground first, right? If you have troubles with your team, please refer to my frequently updated guide on the best teams in AFK Arena here or the tier list of the best heroes (including their best build). Also, don’t miss out on the recently new gift codes that I posted here.
The Forest’s Edge Walkthrough
Enough small talk… let’s jump right into the walkthrough where I show you step-by-step how to solve the Forest’s Edge and reach the final boss.
Step 1 – you’ll find yourself in front of some camps and relic altars right at the start of The Forest’s Edge. Obviously, you need to fight through them.
After that, you will see a triangle of wagons where you need to move the lower one to the right position so you can light up that cannon.
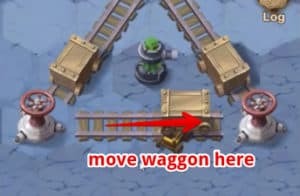
To light up the cannon you need to use the cannon right at the start after you moved the wagon like shown in the image.
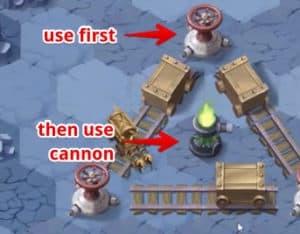
Step 2 – now that you lit the cannon in the middle of that triangle you need to use the upper railroad switch.
This will move the left and the right wagon to the top position and you can use the cannon in the middle again to light up the next cannon on the right side of the map.
Step 3 – now it’s time to go over to the right area of the map. To go to the next area of the Forest’s Edge map you will need to fight through
that camp on top of the triangle and you’re good to go and can walk into the right area of the map.
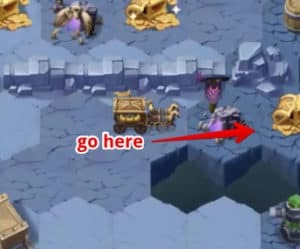
Step 4 – now take out the two elite camps you see there to get the relics and proper access to the railroad switches and it’s time to open up the next sections of the Forest’s Edge.
To do set the wagons up properly you need to go several times with the switches. Remember, when using one switch at the triangle you will always move both connected wagons so you need to go around a little bit until you have that setup shown in the image.
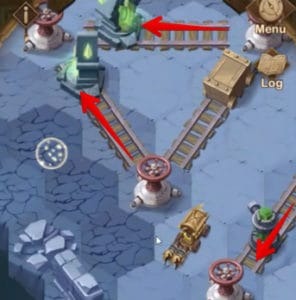
Now use the cannon you lit up in step 2 and you will light up the cannon at the bottom right position.
Step 5 – now you need to change the setup of the wagons again, but this is actually pretty easy.
User the top left switch and then use the bottom switch and you have that setup. If you did not do this you need to play around a little bit until you have that setup shown in the image before you use the bottom right cannon.
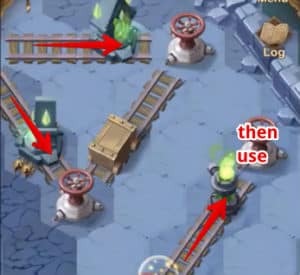
Step 6 – you now have destroyed that barrel blocking your path in the bottom center of the map but first you want to go upwards through the camps to get some more relics.
The battles here can be a little tricky, depending on your setup so having Tasi helps here a lot to take out crucial enemy heroes out of the fight for some time.
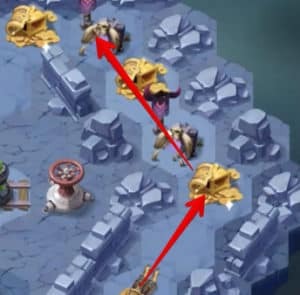
Step 7 – now you will find one railroad there in the top section of the map and you need to set the wagon position to the center position as shown in the image to be able to light it up.
After that walk back to the bottom-right part of the map in The Forest’s Edge.
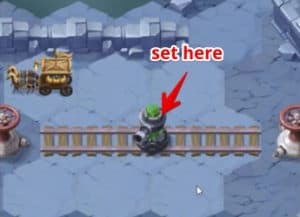
Now you need to change the position of the wagons again to be able to lit the cannon on top.
First use the top left switch to move that iron wagon out of the way and then use the bottom switch to move the cannon at the bottom into the right position.
When you now use the cannon you will fire up the cannon in the top position and you will be able to unblock your path to the next section of the Forest’s Edge.
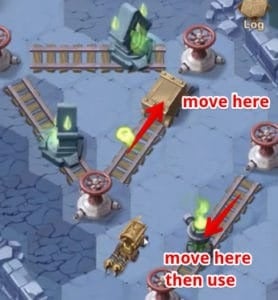
Step 8 – now go back to the top section and move the wagon to the right position and use the cannon. This is important and you don’t want to overlook this because you need that for a later step!
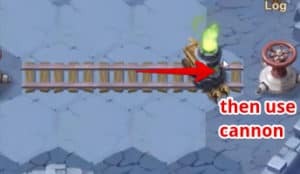
Step 9 – now it’s finally time to destroy that barrel that blocks your path here.
Move the cannon to the left position and then use it to destroy the barrel like you can see in the image here.
Behind that barrel you will find some more chests and camps that you will need to clear now.
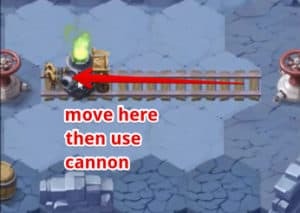
The reason why you do it in that order is that you will get strong and even one legendary relic there from the last camp fight and you really need them before you enter the next area of the map.
That last elite camp here has Khazard who can be nasty do deal with, but if you use Shemira to silence with some heal hero you should be fine.
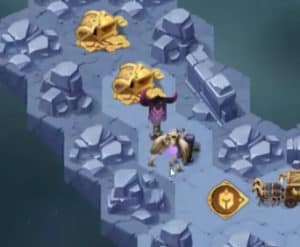
Step 10 – now go back to the path between the first and the second section where you destroyed the barrel in step 5.
You will find several camps and chests there that you need to clear for relics (and loot, of course) before you go to the boss fight – you will need all the relics you can get now.
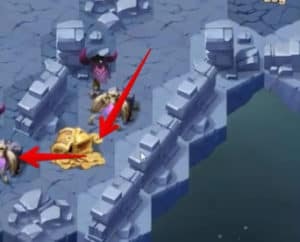
Unless you’ve been really unlucky with relics these fights should not be a problem for you – if they are and you got some horrible relics so far you might need to restart The Forest’s Edge because you might not be strong enough for the final boss fight.
Step 11 – now that you have cleared all the camps and got all the relics you can go for the boss fight. The boss with Twins and Mezoth that can be really annoying. Having Tasi to banish and Rosalina to keep Shemira skill rolling will be really helpful here.
Don’t stop here… the next Wandering Balloon is already waiting with more rewards! See here the full walkthrough for The Frozen Ground.
 and then
