


As always, you find all race-by-race strategies below, with the ideal setup for drivers and car for each race and the ideal pit stop strategy. Please mind that you can now enter your part and driver levels and see what works best for YOUR account!
Please also mind that we update our regular series guides every week with the Featured Assets that have a stats boost.
Event Overview
The races are done all in the same conditions and setups, no matter what day. The races you have on the Qualifying Day are exactly the same you have in the Opening Round and in the Final Round, including the weather conditions. Use the links here to jump to the race.
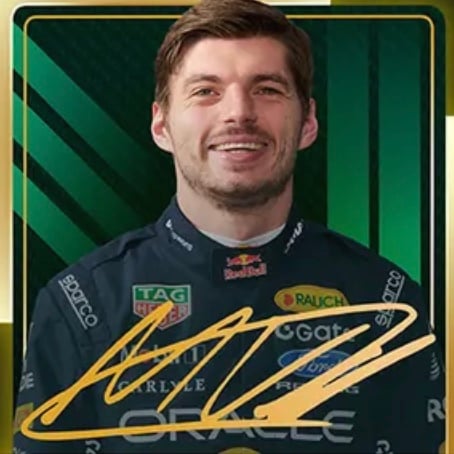
The new Series 12 parts are included in the Champion guides as well as the new Signature Stars Special Edition drivers.
Remember, you can change your car/driver setup for each race and you should – this means you will get the ideal setup for each single one to make sure you land the best prices at the end of the final round of the event.
- Same garage on your phone, tablet and PC
- Survives private mode and clearing your browser
- Enter your parts once — every series & event guide uses them
Unlock with PRO Hide plans
- Same roster on your phone, tablet and PC
- Survives private mode and clearing your browser
- Enter your drivers once — every series & event guide uses them
Unlock with PRO Hide plans
Junior
1 · Best setup. Shows the strongest parts Series 3 unlocks at max level — or, with the switch under the cards, the best of your own parts at your levels.
2 · Enter your garage. Open My garage (or tap ✎ under a part), tap a part to flip it and set your level with ▲ ▼. Bought a higher-series part in the shop? Add it too.
3 · Your setup. Every part is weighed at your level — a well-levelled older part often beats a low-level new one.
4 · Compare. Every part you flip is drawn against your current best level by level, so you see where one overtakes the other.

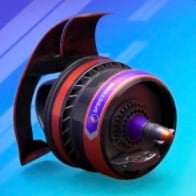
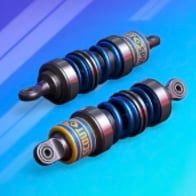

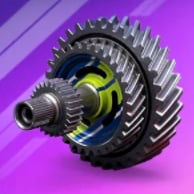
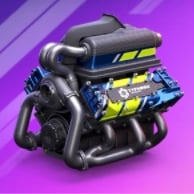
This setup assumes every part is maxed out. Your parts are lower? Tap ✎ under a part or switch to my car parts & levels above.
Based on the parts & levels saved in your garage (this browser). Only parts up to Series 3 are allowed here — higher ones stay saved for the other guides. Tap ✎ under a part to change a level.
1 · Best drivers. Shows the two strongest drivers Series 3 unlocks at max level — or, with the switch under the cards, the best two of your own drivers at your levels.
2 · Enter your drivers. Open My drivers (or tap ✎ under a driver), tap a driver to flip the card and set your level with ▲ ▼. No time to enter Legendary drivers or Special Editions? Switch them off and they're left out.
3 · One seat per driver. Own a driver in several versions? Only the strongest one races — the second seat goes to the next best different driver.
4 · Compare. Every driver you flip is drawn level by level against the driver he'd replace, so you see when an upgrade gets him a seat.
 Paddock Picks
 Paddock Picks
These drivers assume every card is maxed out. Your drivers are lower? Tap ✎ under a driver or switch to my drivers & levels above.
Based on the drivers & levels saved in your roster. Only drivers up to Series 3 are allowed here — the others stay saved for the other guides. Tap ✎ under a driver to change a level.
 1Genesis25150010000
 2Hook15250100000
 3Movember15250000010
 4Handlebar25100000015
 5Cranberry20102000000
 6Djinn15150002000
 7Prince10200200000
 8Reindeer20100000200
 9Gladiator25001501000
 10Merlion025001501001Handlebar251000000152Movember15250000010
 3Tsar10150000025
 4Palm20001000020
 5Pumpkin02001000020
 6Rookie Rush15001000025
 7Iron Force20000020010
 8Nazar01502000015
 9Downforce1050000015
 10Crown50000025201Downforce1050000015
 2Ballast010050050
 3Warrior505010000
 4Self Control05000505
 5Hex0020015050
 6Instinct00010015051Downforce10500000152Self Control050005053Instinct0001001505
1 · Best setup. Shows the strongest parts Series 3 unlocks at max level — or, with the switch under the cards, the best of your own parts at your levels.
2 · Enter your garage. Open My garage (or tap ✎ under a part), tap a part to flip it and set your level with ▲ ▼. Bought a higher-series part in the shop? Add it too.
3 · Your setup. Every part is weighed at your level — a well-levelled older part often beats a low-level new one.
4 · Compare. Every part you flip is drawn against your current best level by level, so you see where one overtakes the other.

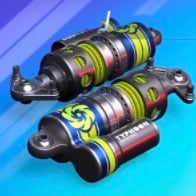
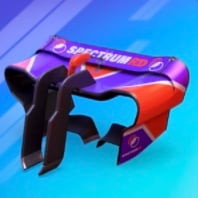
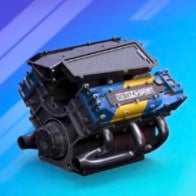
This setup assumes every part is maxed out. Your parts are lower? Tap ✎ under a part or switch to my car parts & levels above.
Based on the parts & levels saved in your garage (this browser). Only parts up to Series 3 are allowed here — higher ones stay saved for the other guides. Tap ✎ under a part to change a level.
1 · Best drivers. Shows the two strongest drivers Series 3 unlocks at max level — or, with the switch under the cards, the best two of your own drivers at your levels.
2 · Enter your drivers. Open My drivers (or tap ✎ under a driver), tap a driver to flip the card and set your level with ▲ ▼. No time to enter Legendary drivers or Special Editions? Switch them off and they're left out.
3 · One seat per driver. Own a driver in several versions? Only the strongest one races — the second seat goes to the next best different driver.
4 · Compare. Every driver you flip is drawn level by level against the driver he'd replace, so you see when an upgrade gets him a seat.
Paddock PicksPaddock PicksThese drivers assume every card is maxed out. Your drivers are lower? Tap ✎ under a driver or switch to my drivers & levels above.
Based on the drivers & levels saved in your roster. Only drivers up to Series 3 are allowed here — the others stay saved for the other guides. Tap ✎ under a driver to change a level.
 1Dragon20150000015
 2Ghoulfuel25100000150
 3Glitz15200001500
 4Unstoppable25100015000
 5Rookie Reload5250002000
 6Rooster20100200000
 7Taurus5250020000
 8Butterfly0250000520
 9Eternal Flame25000150010
 10Feral250000010151Dragon201500000152Butterfly02500005203Feral25000001015
 4Pretzel015000010255Eternal Flame25000150010
 6Frost010015000257Iron Force02020000010
 8Dead Fast02000250059Rookie Rush00151000025
 10Surf02002500051Hex20000150502Instinct01501000053Warrior5050100004Self Control050005055Downforce00100050156Ballast0005010501Instinct01501000052Downforce00100050153Self Control05000505
1 · Best setup. Shows the strongest parts Series 3 unlocks at max level — or, with the switch under the cards, the best of your own parts at your levels.
2 · Enter your garage. Open My garage (or tap ✎ under a part), tap a part to flip it and set your level with ▲ ▼. Bought a higher-series part in the shop? Add it too.
3 · Your setup. Every part is weighed at your level — a well-levelled older part often beats a low-level new one.
4 · Compare. Every part you flip is drawn against your current best level by level, so you see where one overtakes the other.
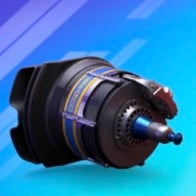
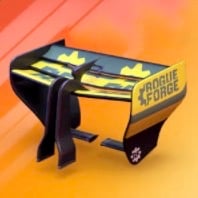
This setup assumes every part is maxed out. Your parts are lower? Tap ✎ under a part or switch to my car parts & levels above.
Based on the parts & levels saved in your garage (this browser). Only parts up to Series 3 are allowed here — higher ones stay saved for the other guides. Tap ✎ under a part to change a level.
1 · Best drivers. Shows the two strongest drivers Series 3 unlocks at max level — or, with the switch under the cards, the best two of your own drivers at your levels.
2 · Enter your drivers. Open My drivers (or tap ✎ under a driver), tap a driver to flip the card and set your level with ▲ ▼. No time to enter Legendary drivers or Special Editions? Switch them off and they're left out.
3 · One seat per driver. Own a driver in several versions? Only the strongest one races — the second seat goes to the next best different driver.
4 · Compare. Every driver you flip is drawn level by level against the driver he'd replace, so you see when an upgrade gets him a seat.
Paddock PicksPaddock PicksThese drivers assume every card is maxed out. Your drivers are lower? Tap ✎ under a driver or switch to my drivers & levels above.
Based on the drivers & levels saved in your roster. Only drivers up to Series 3 are allowed here — the others stay saved for the other guides. Tap ✎ under a driver to change a level.
 1Rainbow25200500002Genesis25100015000
 3Vice25100001500
 4Tulip10200000200
 5Champion025010015006Dead Fast0250002005
 7Eclipse02515000100
 8Full Send02550020009Gladiator2500150100010Handlebar250001000151Handlebar250001000152Palm200010000203Rookie Rush15001000025
 4Eagle015000015205Tsar10000150025
 6Livewire01500000207Dead Fast02500020058Iron Force200000200109Crown500000252010Eternal Flame015250000101Hex01520000502Warrior5105000003Downforce10000500154Instinct00010015055Ballast0005100506Self Control000055051Downforce10000500152Instinct00010015053Self Control00005505
1 · Best setup. Shows the strongest parts Series 3 unlocks at max level — or, with the switch under the cards, the best of your own parts at your levels.
2 · Enter your garage. Open My garage (or tap ✎ under a part), tap a part to flip it and set your level with ▲ ▼. Bought a higher-series part in the shop? Add it too.
3 · Your setup. Every part is weighed at your level — a well-levelled older part often beats a low-level new one.
4 · Compare. Every part you flip is drawn against your current best level by level, so you see where one overtakes the other.
This setup assumes every part is maxed out. Your parts are lower? Tap ✎ under a part or switch to my car parts & levels above.
Based on the parts & levels saved in your garage (this browser). Only parts up to Series 3 are allowed here — higher ones stay saved for the other guides. Tap ✎ under a part to change a level.
1 · Best drivers. Shows the two strongest drivers Series 3 unlocks at max level — or, with the switch under the cards, the best two of your own drivers at your levels.
2 · Enter your drivers. Open My drivers (or tap ✎ under a driver), tap a driver to flip the card and set your level with ▲ ▼. No time to enter Legendary drivers or Special Editions? Switch them off and they're left out.
3 · One seat per driver. Own a driver in several versions? Only the strongest one races — the second seat goes to the next best different driver.
4 · Compare. Every driver you flip is drawn level by level against the driver he'd replace, so you see when an upgrade gets him a seat.
Paddock PicksPaddock PicksThese drivers assume every card is maxed out. Your drivers are lower? Tap ✎ under a driver or switch to my drivers & levels above.
Based on the drivers & levels saved in your roster. Only drivers up to Series 3 are allowed here — the others stay saved for the other guides. Tap ✎ under a driver to change a level.
 1Christmas102000200002Cranberry201020000001Feral250000010152Pumpkin020010000201Hex20000150502Ballast0100500501Downforce05100000152Self Control05000505
Unlock all 12 sections Hide plans
1 · Best setup. Shows the strongest parts Series 3 unlocks at max level — or, with the switch under the cards, the best of your own parts at your levels.
2 · Enter your garage. Open My garage (or tap ✎ under a part), tap a part to flip it and set your level with ▲ ▼. Bought a higher-series part in the shop? Add it too.
3 · Your setup. Every part is weighed at your level — a well-levelled older part often beats a low-level new one.
4 · Compare. Every part you flip is drawn against your current best level by level, so you see where one overtakes the other.
This setup assumes every part is maxed out. Your parts are lower? Tap ✎ under a part or switch to my car parts & levels above.
Based on the parts & levels saved in your garage (this browser). Only parts up to Series 3 are allowed here — higher ones stay saved for the other guides. Tap ✎ under a part to change a level.
1 · Best drivers. Shows the two strongest drivers Series 3 unlocks at max level — or, with the switch under the cards, the best two of your own drivers at your levels.
2 · Enter your drivers. Open My drivers (or tap ✎ under a driver), tap a driver to flip the card and set your level with ▲ ▼. No time to enter Legendary drivers or Special Editions? Switch them off and they're left out.
3 · One seat per driver. Own a driver in several versions? Only the strongest one races — the second seat goes to the next best different driver.
4 · Compare. Every driver you flip is drawn level by level against the driver he'd replace, so you see when an upgrade gets him a seat.
Paddock PicksPaddock PicksThese drivers assume every card is maxed out. Your drivers are lower? Tap ✎ under a driver or switch to my drivers & levels above.
Based on the drivers & levels saved in your roster. Only drivers up to Series 3 are allowed here — the others stay saved for the other guides. Tap ✎ under a driver to change a level.
 1Cuppa20201000000
 2Herald251510000003Prince20200100000
 4Timeless152500100005Hook10250150000
 6Kawaii152000001507Nazar201500000158Pumpkin10200000020
 9Confetti25010000150
 10Launch Pad250000151001Nazar201500000152Pumpkin102000000203Frost150000100254Tsar015010000255Movember025015000106Rookie Rush100015000257Palm100020000208Surf25000020059Handlebar0100250001510Pretzel000001510251Ballast5100000502Instinct10000015053Downforce05010000154Self Control050005055Hex00200150506Warrior0055100001Downforce05010000152Instinct10000015053Self Control05000505
1 · Best setup. Shows the strongest parts Series 3 unlocks at max level — or, with the switch under the cards, the best of your own parts at your levels.
2 · Enter your garage. Open My garage (or tap ✎ under a part), tap a part to flip it and set your level with ▲ ▼. Bought a higher-series part in the shop? Add it too.
3 · Your setup. Every part is weighed at your level — a well-levelled older part often beats a low-level new one.
4 · Compare. Every part you flip is drawn against your current best level by level, so you see where one overtakes the other.
This setup assumes every part is maxed out. Your parts are lower? Tap ✎ under a part or switch to my car parts & levels above.
Based on the parts & levels saved in your garage (this browser). Only parts up to Series 3 are allowed here — higher ones stay saved for the other guides. Tap ✎ under a part to change a level.
1 · Best drivers. Shows the two strongest drivers Series 3 unlocks at max level — or, with the switch under the cards, the best two of your own drivers at your levels.
2 · Enter your drivers. Open My drivers (or tap ✎ under a driver), tap a driver to flip the card and set your level with ▲ ▼. No time to enter Legendary drivers or Special Editions? Switch them off and they're left out.
3 · One seat per driver. Own a driver in several versions? Only the strongest one races — the second seat goes to the next best different driver.
4 · Compare. Every driver you flip is drawn level by level against the driver he'd replace, so you see when an upgrade gets him a seat.
Paddock PicksPaddock PicksThese drivers assume every card is maxed out. Your drivers are lower? Tap ✎ under a driver or switch to my drivers & levels above.
Based on the drivers & levels saved in your roster. Only drivers up to Series 3 are allowed here — the others stay saved for the other guides. Tap ✎ under a driver to change a level.
1Cuppa202010000002Herald251510000001Nazar201500000152Pumpkin102000000201Ballast5100000502Instinct10000015051Downforce05010000152Instinct1000001505Unlock all 12 sections Hide plans
1 · Best setup. Shows the strongest parts Series 3 unlocks at max level — or, with the switch under the cards, the best of your own parts at your levels.
2 · Enter your garage. Open My garage (or tap ✎ under a part), tap a part to flip it and set your level with ▲ ▼. Bought a higher-series part in the shop? Add it too.
3 · Your setup. Every part is weighed at your level — a well-levelled older part often beats a low-level new one.
4 · Compare. Every part you flip is drawn against your current best level by level, so you see where one overtakes the other.
This setup assumes every part is maxed out. Your parts are lower? Tap ✎ under a part or switch to my car parts & levels above.
Based on the parts & levels saved in your garage (this browser). Only parts up to Series 3 are allowed here — higher ones stay saved for the other guides. Tap ✎ under a part to change a level.
1 · Best drivers. Shows the two strongest drivers Series 3 unlocks at max level — or, with the switch under the cards, the best two of your own drivers at your levels.
2 · Enter your drivers. Open My drivers (or tap ✎ under a driver), tap a driver to flip the card and set your level with ▲ ▼. No time to enter Legendary drivers or Special Editions? Switch them off and they're left out.
3 · One seat per driver. Own a driver in several versions? Only the strongest one races — the second seat goes to the next best different driver.
4 · Compare. Every driver you flip is drawn level by level against the driver he'd replace, so you see when an upgrade gets him a seat.
Paddock PicksPaddock PicksThese drivers assume every card is maxed out. Your drivers are lower? Tap ✎ under a driver or switch to my drivers & levels above.
Based on the drivers & levels saved in your roster. Only drivers up to Series 3 are allowed here — the others stay saved for the other guides. Tap ✎ under a driver to change a level.
1Rainbow25200500002Genesis251000150001Handlebar250001000152Palm200010000201Hex01520000502Warrior5105000001Downforce10000500152Instinct0001001505Unlock all 12 sections Hide plans
1 · Best setup. Shows the strongest parts Series 3 unlocks at max level — or, with the switch under the cards, the best of your own parts at your levels.
2 · Enter your garage. Open My garage (or tap ✎ under a part), tap a part to flip it and set your level with ▲ ▼. Bought a higher-series part in the shop? Add it too.
3 · Your setup. Every part is weighed at your level — a well-levelled older part often beats a low-level new one.
4 · Compare. Every part you flip is drawn against your current best level by level, so you see where one overtakes the other.
This setup assumes every part is maxed out. Your parts are lower? Tap ✎ under a part or switch to my car parts & levels above.
Based on the parts & levels saved in your garage (this browser). Only parts up to Series 3 are allowed here — higher ones stay saved for the other guides. Tap ✎ under a part to change a level.
1 · Best drivers. Shows the two strongest drivers Series 3 unlocks at max level — or, with the switch under the cards, the best two of your own drivers at your levels.
2 · Enter your drivers. Open My drivers (or tap ✎ under a driver), tap a driver to flip the card and set your level with ▲ ▼. No time to enter Legendary drivers or Special Editions? Switch them off and they're left out.
3 · One seat per driver. Own a driver in several versions? Only the strongest one races — the second seat goes to the next best different driver.
4 · Compare. Every driver you flip is drawn level by level against the driver he'd replace, so you see when an upgrade gets him a seat.
Paddock PicksPaddock PicksThese drivers assume every card is maxed out. Your drivers are lower? Tap ✎ under a driver or switch to my drivers & levels above.
Based on the drivers & levels saved in your roster. Only drivers up to Series 3 are allowed here — the others stay saved for the other guides. Tap ✎ under a driver to change a level.
1Genesis251500100002Hook152501000003Movember152500000104Handlebar251000000155Cranberry201020000006Djinn151500020007Prince102002000008Reindeer201000002009Gladiator2500150100010Merlion025001501001Handlebar251000000152Movember152500000103Tsar101500000254Palm200010000205Pumpkin020010000206Rookie Rush150010000257Iron Force200000200108Nazar015020000159Downforce105000001510Crown50000025201Downforce10500000152Ballast0100500503Warrior5050100004Self Control050005055Hex00200150506Instinct00010015051Downforce10500000152Self Control050005053Instinct0001001505Challenger
1 · Best setup. Shows the strongest parts Series 6 unlocks at max level — or, with the switch under the cards, the best of your own parts at your levels.
2 · Enter your garage. Open My garage (or tap ✎ under a part), tap a part to flip it and set your level with ▲ ▼. Bought a higher-series part in the shop? Add it too.
3 · Your setup. Every part is weighed at your level — a well-levelled older part often beats a low-level new one.
4 · Compare. Every part you flip is drawn against your current best level by level, so you see where one overtakes the other.


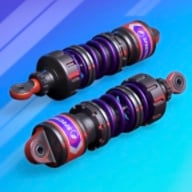
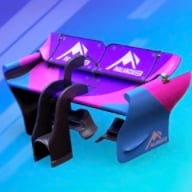
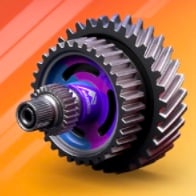
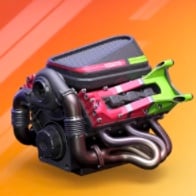
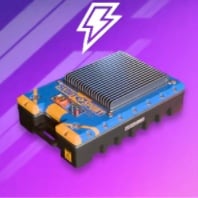
This setup assumes every part is maxed out. Your parts are lower? Tap ✎ under a part or switch to my car parts & levels above.
Based on the parts & levels saved in your garage (this browser). Only parts up to Series 6 are allowed here — higher ones stay saved for the other guides. Tap ✎ under a part to change a level.
1 · Best drivers. Shows the two strongest drivers Series 6 unlocks at max level — or, with the switch under the cards, the best two of your own drivers at your levels.
2 · Enter your drivers. Open My drivers (or tap ✎ under a driver), tap a driver to flip the card and set your level with ▲ ▼. No time to enter Legendary drivers or Special Editions? Switch them off and they're left out.
3 · One seat per driver. Own a driver in several versions? Only the strongest one races — the second seat goes to the next best different driver.
4 · Compare. Every driver you flip is drawn level by level against the driver he'd replace, so you see when an upgrade gets him a seat.
 Paddock Picks
 Paddock Picks
These drivers assume every card is maxed out. Your drivers are lower? Tap ✎ under a driver or switch to my drivers & levels above.
Based on the drivers & levels saved in your roster. Only drivers up to Series 6 are allowed here — the others stay saved for the other guides. Tap ✎ under a driver to change a level.
1Genesis251500100002Hook152501000003Movember152500000104Handlebar251000000155Cranberry201020000006Djinn151500020007Prince102002000008Reindeer201000002009Gladiator2500150100010Merlion025001501001Handlebar251000000152Movember152500000103Tsar101500000254Palm200010000205Pumpkin020010000206Rookie Rush150010000257Iron Force200000200108Nazar015020000159Downforce105000001510Crown50000025201Downforce10500000152Ballast0100500503Warrior5050100004Self Control050005055Hex00200150506Instinct00010015051Downforce10500000152Self Control050005053Instinct0001001505
1 · Best setup. Shows the strongest parts Series 6 unlocks at max level — or, with the switch under the cards, the best of your own parts at your levels.
2 · Enter your garage. Open My garage (or tap ✎ under a part), tap a part to flip it and set your level with ▲ ▼. Bought a higher-series part in the shop? Add it too.
3 · Your setup. Every part is weighed at your level — a well-levelled older part often beats a low-level new one.
4 · Compare. Every part you flip is drawn against your current best level by level, so you see where one overtakes the other.
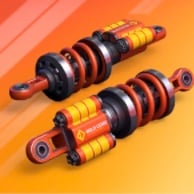
This setup assumes every part is maxed out. Your parts are lower? Tap ✎ under a part or switch to my car parts & levels above.
Based on the parts & levels saved in your garage (this browser). Only parts up to Series 6 are allowed here — higher ones stay saved for the other guides. Tap ✎ under a part to change a level.
1 · Best drivers. Shows the two strongest drivers Series 6 unlocks at max level — or, with the switch under the cards, the best two of your own drivers at your levels.
2 · Enter your drivers. Open My drivers (or tap ✎ under a driver), tap a driver to flip the card and set your level with ▲ ▼. No time to enter Legendary drivers or Special Editions? Switch them off and they're left out.
3 · One seat per driver. Own a driver in several versions? Only the strongest one races — the second seat goes to the next best different driver.
4 · Compare. Every driver you flip is drawn level by level against the driver he'd replace, so you see when an upgrade gets him a seat.
Paddock PicksPaddock PicksThese drivers assume every card is maxed out. Your drivers are lower? Tap ✎ under a driver or switch to my drivers & levels above.
Based on the drivers & levels saved in your roster. Only drivers up to Series 6 are allowed here — the others stay saved for the other guides. Tap ✎ under a driver to change a level.
1Dragon201500000152Ghoulfuel251000001503Glitz152000015004Unstoppable251000150005Rookie Reload52500020006Rooster201002000007Taurus52500200008Butterfly02500005209Eternal Flame2500015001010Feral250000010151Dragon201500000152Butterfly02500005203Feral250000010154Pretzel015000010255Eternal Flame250001500106Frost010015000257Iron Force020200000108Dead Fast02000250059Rookie Rush0015100002510Surf02002500051Hex20000150502Instinct01501000053Warrior5050100004Self Control050005055Downforce00100050156Ballast0005010501Instinct01501000052Downforce00100050153Self Control05000505
1 · Best setup. Shows the strongest parts Series 6 unlocks at max level — or, with the switch under the cards, the best of your own parts at your levels.
2 · Enter your garage. Open My garage (or tap ✎ under a part), tap a part to flip it and set your level with ▲ ▼. Bought a higher-series part in the shop? Add it too.
3 · Your setup. Every part is weighed at your level — a well-levelled older part often beats a low-level new one.
4 · Compare. Every part you flip is drawn against your current best level by level, so you see where one overtakes the other.
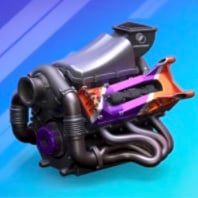
This setup assumes every part is maxed out. Your parts are lower? Tap ✎ under a part or switch to my car parts & levels above.
Based on the parts & levels saved in your garage (this browser). Only parts up to Series 6 are allowed here — higher ones stay saved for the other guides. Tap ✎ under a part to change a level.
1 · Best drivers. Shows the two strongest drivers Series 6 unlocks at max level — or, with the switch under the cards, the best two of your own drivers at your levels.
2 · Enter your drivers. Open My drivers (or tap ✎ under a driver), tap a driver to flip the card and set your level with ▲ ▼. No time to enter Legendary drivers or Special Editions? Switch them off and they're left out.
3 · One seat per driver. Own a driver in several versions? Only the strongest one races — the second seat goes to the next best different driver.
4 · Compare. Every driver you flip is drawn level by level against the driver he'd replace, so you see when an upgrade gets him a seat.
Paddock PicksPaddock PicksThese drivers assume every card is maxed out. Your drivers are lower? Tap ✎ under a driver or switch to my drivers & levels above.
Based on the drivers & levels saved in your roster. Only drivers up to Series 6 are allowed here — the others stay saved for the other guides. Tap ✎ under a driver to change a level.
1Rainbow25200500002Genesis251000150003Vice251000015004Tulip102000002005Champion025010015006Dead Fast02500020057Eclipse025150001008Full Send02550020009Gladiator2500150100010Handlebar250001000151Handlebar250001000152Palm200010000203Rookie Rush150010000254Eagle015000015205Tsar100001500256Livewire01500000207Dead Fast02500020058Iron Force200000200109Crown500000252010Eternal Flame015250000101Hex01520000502Warrior5105000003Downforce10000500154Instinct00010015055Ballast0005100506Self Control000055051Downforce10000500152Instinct00010015053Self Control00005505
1 · Best setup. Shows the strongest parts Series 6 unlocks at max level — or, with the switch under the cards, the best of your own parts at your levels.
2 · Enter your garage. Open My garage (or tap ✎ under a part), tap a part to flip it and set your level with ▲ ▼. Bought a higher-series part in the shop? Add it too.
3 · Your setup. Every part is weighed at your level — a well-levelled older part often beats a low-level new one.
4 · Compare. Every part you flip is drawn against your current best level by level, so you see where one overtakes the other.
This setup assumes every part is maxed out. Your parts are lower? Tap ✎ under a part or switch to my car parts & levels above.
Based on the parts & levels saved in your garage (this browser). Only parts up to Series 6 are allowed here — higher ones stay saved for the other guides. Tap ✎ under a part to change a level.
1 · Best drivers. Shows the two strongest drivers Series 6 unlocks at max level — or, with the switch under the cards, the best two of your own drivers at your levels.
2 · Enter your drivers. Open My drivers (or tap ✎ under a driver), tap a driver to flip the card and set your level with ▲ ▼. No time to enter Legendary drivers or Special Editions? Switch them off and they're left out.
3 · One seat per driver. Own a driver in several versions? Only the strongest one races — the second seat goes to the next best different driver.
4 · Compare. Every driver you flip is drawn level by level against the driver he'd replace, so you see when an upgrade gets him a seat.
Paddock PicksPaddock PicksThese drivers assume every card is maxed out. Your drivers are lower? Tap ✎ under a driver or switch to my drivers & levels above.
Based on the drivers & levels saved in your roster. Only drivers up to Series 6 are allowed here — the others stay saved for the other guides. Tap ✎ under a driver to change a level.
1Christmas102000200002Cranberry201020000001Feral250000010152Pumpkin020010000201Hex20000150502Ballast0100500501Downforce05100000152Self Control05000505Unlock all 12 sections Hide plans
1 · Best setup. Shows the strongest parts Series 6 unlocks at max level — or, with the switch under the cards, the best of your own parts at your levels.
2 · Enter your garage. Open My garage (or tap ✎ under a part), tap a part to flip it and set your level with ▲ ▼. Bought a higher-series part in the shop? Add it too.
3 · Your setup. Every part is weighed at your level — a well-levelled older part often beats a low-level new one.
4 · Compare. Every part you flip is drawn against your current best level by level, so you see where one overtakes the other.
This setup assumes every part is maxed out. Your parts are lower? Tap ✎ under a part or switch to my car parts & levels above.
Based on the parts & levels saved in your garage (this browser). Only parts up to Series 6 are allowed here — higher ones stay saved for the other guides. Tap ✎ under a part to change a level.
1 · Best drivers. Shows the two strongest drivers Series 6 unlocks at max level — or, with the switch under the cards, the best two of your own drivers at your levels.
2 · Enter your drivers. Open My drivers (or tap ✎ under a driver), tap a driver to flip the card and set your level with ▲ ▼. No time to enter Legendary drivers or Special Editions? Switch them off and they're left out.
3 · One seat per driver. Own a driver in several versions? Only the strongest one races — the second seat goes to the next best different driver.
4 · Compare. Every driver you flip is drawn level by level against the driver he'd replace, so you see when an upgrade gets him a seat.
Paddock PicksPaddock PicksThese drivers assume every card is maxed out. Your drivers are lower? Tap ✎ under a driver or switch to my drivers & levels above.
Based on the drivers & levels saved in your roster. Only drivers up to Series 6 are allowed here — the others stay saved for the other guides. Tap ✎ under a driver to change a level.
1Cuppa202010000002Herald251510000003Prince202001000004Timeless152500100005Hook102501500006Kawaii152000001507Nazar201500000158Pumpkin102000000209Confetti2501000015010Launch Pad250000151001Nazar201500000152Pumpkin102000000203Frost150000100254Tsar015010000255Movember025015000106Rookie Rush100015000257Palm100020000208Surf25000020059Handlebar0100250001510Pretzel000001510251Ballast5100000502Instinct10000015053Downforce05010000154Self Control050005055Hex00200150506Warrior0055100001Downforce05010000152Instinct10000015053Self Control05000505
1 · Best setup. Shows the strongest parts Series 6 unlocks at max level — or, with the switch under the cards, the best of your own parts at your levels.
2 · Enter your garage. Open My garage (or tap ✎ under a part), tap a part to flip it and set your level with ▲ ▼. Bought a higher-series part in the shop? Add it too.
3 · Your setup. Every part is weighed at your level — a well-levelled older part often beats a low-level new one.
4 · Compare. Every part you flip is drawn against your current best level by level, so you see where one overtakes the other.
This setup assumes every part is maxed out. Your parts are lower? Tap ✎ under a part or switch to my car parts & levels above.
Based on the parts & levels saved in your garage (this browser). Only parts up to Series 6 are allowed here — higher ones stay saved for the other guides. Tap ✎ under a part to change a level.
1 · Best drivers. Shows the two strongest drivers Series 6 unlocks at max level — or, with the switch under the cards, the best two of your own drivers at your levels.
2 · Enter your drivers. Open My drivers (or tap ✎ under a driver), tap a driver to flip the card and set your level with ▲ ▼. No time to enter Legendary drivers or Special Editions? Switch them off and they're left out.
3 · One seat per driver. Own a driver in several versions? Only the strongest one races — the second seat goes to the next best different driver.
4 · Compare. Every driver you flip is drawn level by level against the driver he'd replace, so you see when an upgrade gets him a seat.
Paddock PicksPaddock PicksThese drivers assume every card is maxed out. Your drivers are lower? Tap ✎ under a driver or switch to my drivers & levels above.
Based on the drivers & levels saved in your roster. Only drivers up to Series 6 are allowed here — the others stay saved for the other guides. Tap ✎ under a driver to change a level.
1Cuppa202010000002Herald251510000001Nazar201500000152Pumpkin102000000201Ballast5100000502Instinct10000015051Downforce05010000152Instinct1000001505Unlock all 12 sections Hide plans
1 · Best setup. Shows the strongest parts Series 6 unlocks at max level — or, with the switch under the cards, the best of your own parts at your levels.
2 · Enter your garage. Open My garage (or tap ✎ under a part), tap a part to flip it and set your level with ▲ ▼. Bought a higher-series part in the shop? Add it too.
3 · Your setup. Every part is weighed at your level — a well-levelled older part often beats a low-level new one.
4 · Compare. Every part you flip is drawn against your current best level by level, so you see where one overtakes the other.
This setup assumes every part is maxed out. Your parts are lower? Tap ✎ under a part or switch to my car parts & levels above.
Based on the parts & levels saved in your garage (this browser). Only parts up to Series 6 are allowed here — higher ones stay saved for the other guides. Tap ✎ under a part to change a level.
1 · Best drivers. Shows the two strongest drivers Series 6 unlocks at max level — or, with the switch under the cards, the best two of your own drivers at your levels.
2 · Enter your drivers. Open My drivers (or tap ✎ under a driver), tap a driver to flip the card and set your level with ▲ ▼. No time to enter Legendary drivers or Special Editions? Switch them off and they're left out.
3 · One seat per driver. Own a driver in several versions? Only the strongest one races — the second seat goes to the next best different driver.
4 · Compare. Every driver you flip is drawn level by level against the driver he'd replace, so you see when an upgrade gets him a seat.
Paddock PicksPaddock PicksThese drivers assume every card is maxed out. Your drivers are lower? Tap ✎ under a driver or switch to my drivers & levels above.
Based on the drivers & levels saved in your roster. Only drivers up to Series 6 are allowed here — the others stay saved for the other guides. Tap ✎ under a driver to change a level.
1Rainbow25200500002Genesis251000150001Handlebar250001000152Palm200010000201Hex01520000502Warrior5105000001Downforce10000500152Instinct0001001505Unlock all 12 sections Hide plans
1 · Best setup. Shows the strongest parts Series 6 unlocks at max level — or, with the switch under the cards, the best of your own parts at your levels.
2 · Enter your garage. Open My garage (or tap ✎ under a part), tap a part to flip it and set your level with ▲ ▼. Bought a higher-series part in the shop? Add it too.
3 · Your setup. Every part is weighed at your level — a well-levelled older part often beats a low-level new one.
4 · Compare. Every part you flip is drawn against your current best level by level, so you see where one overtakes the other.
This setup assumes every part is maxed out. Your parts are lower? Tap ✎ under a part or switch to my car parts & levels above.
Based on the parts & levels saved in your garage (this browser). Only parts up to Series 6 are allowed here — higher ones stay saved for the other guides. Tap ✎ under a part to change a level.
1 · Best drivers. Shows the two strongest drivers Series 6 unlocks at max level — or, with the switch under the cards, the best two of your own drivers at your levels.
2 · Enter your drivers. Open My drivers (or tap ✎ under a driver), tap a driver to flip the card and set your level with ▲ ▼. No time to enter Legendary drivers or Special Editions? Switch them off and they're left out.
3 · One seat per driver. Own a driver in several versions? Only the strongest one races — the second seat goes to the next best different driver.
4 · Compare. Every driver you flip is drawn level by level against the driver he'd replace, so you see when an upgrade gets him a seat.
Paddock PicksPaddock PicksThese drivers assume every card is maxed out. Your drivers are lower? Tap ✎ under a driver or switch to my drivers & levels above.
Based on the drivers & levels saved in your roster. Only drivers up to Series 6 are allowed here — the others stay saved for the other guides. Tap ✎ under a driver to change a level.
1Genesis251500100002Hook152501000003Movember152500000104Handlebar251000000155Cranberry201020000006Djinn151500020007Prince102002000008Reindeer201000002009Gladiator2500150100010Merlion025001501001Handlebar251000000152Movember152500000103Tsar101500000254Palm200010000205Pumpkin020010000206Rookie Rush150010000257Iron Force200000200108Nazar015020000159Downforce105000001510Crown50000025201Downforce10500000152Ballast0100500503Warrior5050100004Self Control050005055Hex00200150506Instinct00010015051Downforce10500000152Self Control050005053Instinct0001001505Contender
1 · Best setup. Shows the strongest parts Series 9 unlocks at max level — or, with the switch under the cards, the best of your own parts at your levels.
2 · Enter your garage. Open My garage (or tap ✎ under a part), tap a part to flip it and set your level with ▲ ▼. Bought a higher-series part in the shop? Add it too.
3 · Your setup. Every part is weighed at your level — a well-levelled older part often beats a low-level new one.
4 · Compare. Every part you flip is drawn against your current best level by level, so you see where one overtakes the other.
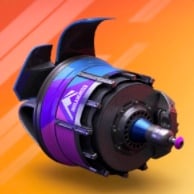
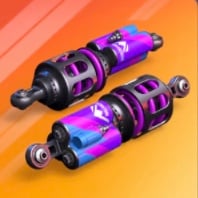

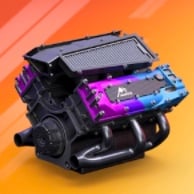
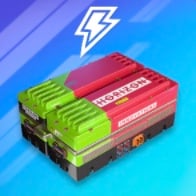
This setup assumes every part is maxed out. Your parts are lower? Tap ✎ under a part or switch to my car parts & levels above.
Based on the parts & levels saved in your garage (this browser). Only parts up to Series 9 are allowed here — higher ones stay saved for the other guides. Tap ✎ under a part to change a level.
1 · Best drivers. Shows the two strongest drivers Series 9 unlocks at max level — or, with the switch under the cards, the best two of your own drivers at your levels.
2 · Enter your drivers. Open My drivers (or tap ✎ under a driver), tap a driver to flip the card and set your level with ▲ ▼. No time to enter Legendary drivers or Special Editions? Switch them off and they're left out.
3 · One seat per driver. Own a driver in several versions? Only the strongest one races — the second seat goes to the next best different driver.
4 · Compare. Every driver you flip is drawn level by level against the driver he'd replace, so you see when an upgrade gets him a seat.
 Signature Stars
 Legendary
These drivers assume every card is maxed out. Your drivers are lower? Tap ✎ under a driver or switch to my drivers & levels above.
Based on the drivers & levels saved in your roster. Only drivers up to Series 9 are allowed here — the others stay saved for the other guides. Tap ✎ under a driver to change a level.
1Genesis251500100002Hook152501000003Movember152500000104Handlebar251000000155Cranberry201020000006Djinn151500020007Prince102002000008Reindeer201000002009Gladiator2500150100010Merlion025001501001Handlebar251000000152Movember152500000103Tsar101500000254Palm200010000205Pumpkin020010000206Rookie Rush150010000257Iron Force200000200108Nazar015020000159Downforce105000001510Crown50000025201Downforce10500000152Ballast0100500503Warrior5050100004Self Control050005055Hex00200150506Instinct00010015051Downforce10500000152Self Control050005053Instinct0001001505
1 · Best setup. Shows the strongest parts Series 9 unlocks at max level — or, with the switch under the cards, the best of your own parts at your levels.
2 · Enter your garage. Open My garage (or tap ✎ under a part), tap a part to flip it and set your level with ▲ ▼. Bought a higher-series part in the shop? Add it too.
3 · Your setup. Every part is weighed at your level — a well-levelled older part often beats a low-level new one.
4 · Compare. Every part you flip is drawn against your current best level by level, so you see where one overtakes the other.

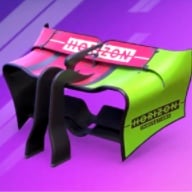
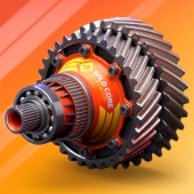
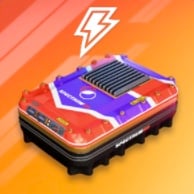
This setup assumes every part is maxed out. Your parts are lower? Tap ✎ under a part or switch to my car parts & levels above.
Based on the parts & levels saved in your garage (this browser). Only parts up to Series 9 are allowed here — higher ones stay saved for the other guides. Tap ✎ under a part to change a level.
1 · Best drivers. Shows the two strongest drivers Series 9 unlocks at max level — or, with the switch under the cards, the best two of your own drivers at your levels.
2 · Enter your drivers. Open My drivers (or tap ✎ under a driver), tap a driver to flip the card and set your level with ▲ ▼. No time to enter Legendary drivers or Special Editions? Switch them off and they're left out.
3 · One seat per driver. Own a driver in several versions? Only the strongest one races — the second seat goes to the next best different driver.
4 · Compare. Every driver you flip is drawn level by level against the driver he'd replace, so you see when an upgrade gets him a seat.
Signature StarsLegendaryThese drivers assume every card is maxed out. Your drivers are lower? Tap ✎ under a driver or switch to my drivers & levels above.
Based on the drivers & levels saved in your roster. Only drivers up to Series 9 are allowed here — the others stay saved for the other guides. Tap ✎ under a driver to change a level.
1Dragon201500000152Ghoulfuel251000001503Glitz152000015004Unstoppable251000150005Rookie Reload52500020006Rooster201002000007Taurus52500200008Butterfly02500005209Eternal Flame2500015001010Feral250000010151Dragon201500000152Butterfly02500005203Feral250000010154Pretzel015000010255Eternal Flame250001500106Frost010015000257Iron Force020200000108Dead Fast02000250059Rookie Rush0015100002510Surf02002500051Hex20000150502Instinct01501000053Warrior5050100004Self Control050005055Downforce00100050156Ballast0005010501Instinct01501000052Downforce00100050153Self Control05000505
1 · Best setup. Shows the strongest parts Series 9 unlocks at max level — or, with the switch under the cards, the best of your own parts at your levels.
2 · Enter your garage. Open My garage (or tap ✎ under a part), tap a part to flip it and set your level with ▲ ▼. Bought a higher-series part in the shop? Add it too.
3 · Your setup. Every part is weighed at your level — a well-levelled older part often beats a low-level new one.
4 · Compare. Every part you flip is drawn against your current best level by level, so you see where one overtakes the other.
This setup assumes every part is maxed out. Your parts are lower? Tap ✎ under a part or switch to my car parts & levels above.
Based on the parts & levels saved in your garage (this browser). Only parts up to Series 9 are allowed here — higher ones stay saved for the other guides. Tap ✎ under a part to change a level.
1 · Best drivers. Shows the two strongest drivers Series 9 unlocks at max level — or, with the switch under the cards, the best two of your own drivers at your levels.
2 · Enter your drivers. Open My drivers (or tap ✎ under a driver), tap a driver to flip the card and set your level with ▲ ▼. No time to enter Legendary drivers or Special Editions? Switch them off and they're left out.
3 · One seat per driver. Own a driver in several versions? Only the strongest one races — the second seat goes to the next best different driver.
4 · Compare. Every driver you flip is drawn level by level against the driver he'd replace, so you see when an upgrade gets him a seat.
Signature StarsLegendaryThese drivers assume every card is maxed out. Your drivers are lower? Tap ✎ under a driver or switch to my drivers & levels above.
Based on the drivers & levels saved in your roster. Only drivers up to Series 9 are allowed here — the others stay saved for the other guides. Tap ✎ under a driver to change a level.
1Rainbow25200500002Genesis251000150003Vice251000015004Tulip102000002005Champion025010015006Dead Fast02500020057Eclipse025150001008Full Send02550020009Gladiator2500150100010Handlebar250001000151Handlebar250001000152Palm200010000203Rookie Rush150010000254Eagle015000015205Tsar100001500256Livewire01500000207Dead Fast02500020058Iron Force200000200109Crown500000252010Eternal Flame015250000101Hex01520000502Warrior5105000003Downforce10000500154Instinct00010015055Ballast0005100506Self Control000055051Downforce10000500152Instinct00010015053Self Control00005505
1 · Best setup. Shows the strongest parts Series 9 unlocks at max level — or, with the switch under the cards, the best of your own parts at your levels.
2 · Enter your garage. Open My garage (or tap ✎ under a part), tap a part to flip it and set your level with ▲ ▼. Bought a higher-series part in the shop? Add it too.
3 · Your setup. Every part is weighed at your level — a well-levelled older part often beats a low-level new one.
4 · Compare. Every part you flip is drawn against your current best level by level, so you see where one overtakes the other.
This setup assumes every part is maxed out. Your parts are lower? Tap ✎ under a part or switch to my car parts & levels above.
Based on the parts & levels saved in your garage (this browser). Only parts up to Series 9 are allowed here — higher ones stay saved for the other guides. Tap ✎ under a part to change a level.
1 · Best drivers. Shows the two strongest drivers Series 9 unlocks at max level — or, with the switch under the cards, the best two of your own drivers at your levels.
2 · Enter your drivers. Open My drivers (or tap ✎ under a driver), tap a driver to flip the card and set your level with ▲ ▼. No time to enter Legendary drivers or Special Editions? Switch them off and they're left out.
3 · One seat per driver. Own a driver in several versions? Only the strongest one races — the second seat goes to the next best different driver.
4 · Compare. Every driver you flip is drawn level by level against the driver he'd replace, so you see when an upgrade gets him a seat.
Signature StarsLegendaryThese drivers assume every card is maxed out. Your drivers are lower? Tap ✎ under a driver or switch to my drivers & levels above.
Based on the drivers & levels saved in your roster. Only drivers up to Series 9 are allowed here — the others stay saved for the other guides. Tap ✎ under a driver to change a level.
1Christmas102000200002Cranberry201020000001Feral250000010152Pumpkin020010000201Hex20000150502Ballast0100500501Downforce05100000152Self Control05000505Unlock all 12 sections Hide plans
1 · Best setup. Shows the strongest parts Series 9 unlocks at max level — or, with the switch under the cards, the best of your own parts at your levels.
2 · Enter your garage. Open My garage (or tap ✎ under a part), tap a part to flip it and set your level with ▲ ▼. Bought a higher-series part in the shop? Add it too.
3 · Your setup. Every part is weighed at your level — a well-levelled older part often beats a low-level new one.
4 · Compare. Every part you flip is drawn against your current best level by level, so you see where one overtakes the other.
This setup assumes every part is maxed out. Your parts are lower? Tap ✎ under a part or switch to my car parts & levels above.
Based on the parts & levels saved in your garage (this browser). Only parts up to Series 9 are allowed here — higher ones stay saved for the other guides. Tap ✎ under a part to change a level.
1 · Best drivers. Shows the two strongest drivers Series 9 unlocks at max level — or, with the switch under the cards, the best two of your own drivers at your levels.
2 · Enter your drivers. Open My drivers (or tap ✎ under a driver), tap a driver to flip the card and set your level with ▲ ▼. No time to enter Legendary drivers or Special Editions? Switch them off and they're left out.
3 · One seat per driver. Own a driver in several versions? Only the strongest one races — the second seat goes to the next best different driver.
4 · Compare. Every driver you flip is drawn level by level against the driver he'd replace, so you see when an upgrade gets him a seat.
Signature StarsLegendaryThese drivers assume every card is maxed out. Your drivers are lower? Tap ✎ under a driver or switch to my drivers & levels above.
Based on the drivers & levels saved in your roster. Only drivers up to Series 9 are allowed here — the others stay saved for the other guides. Tap ✎ under a driver to change a level.
1Cuppa202010000002Herald251510000003Prince202001000004Timeless152500100005Hook102501500006Kawaii152000001507Nazar201500000158Pumpkin102000000209Confetti2501000015010Launch Pad250000151001Nazar201500000152Pumpkin102000000203Frost150000100254Tsar015010000255Movember025015000106Rookie Rush100015000257Palm100020000208Surf25000020059Handlebar0100250001510Pretzel000001510251Ballast5100000502Instinct10000015053Downforce05010000154Self Control050005055Hex00200150506Warrior0055100001Downforce05010000152Instinct10000015053Self Control05000505
1 · Best setup. Shows the strongest parts Series 9 unlocks at max level — or, with the switch under the cards, the best of your own parts at your levels.
2 · Enter your garage. Open My garage (or tap ✎ under a part), tap a part to flip it and set your level with ▲ ▼. Bought a higher-series part in the shop? Add it too.
3 · Your setup. Every part is weighed at your level — a well-levelled older part often beats a low-level new one.
4 · Compare. Every part you flip is drawn against your current best level by level, so you see where one overtakes the other.
This setup assumes every part is maxed out. Your parts are lower? Tap ✎ under a part or switch to my car parts & levels above.
Based on the parts & levels saved in your garage (this browser). Only parts up to Series 9 are allowed here — higher ones stay saved for the other guides. Tap ✎ under a part to change a level.
1 · Best drivers. Shows the two strongest drivers Series 9 unlocks at max level — or, with the switch under the cards, the best two of your own drivers at your levels.
2 · Enter your drivers. Open My drivers (or tap ✎ under a driver), tap a driver to flip the card and set your level with ▲ ▼. No time to enter Legendary drivers or Special Editions? Switch them off and they're left out.
3 · One seat per driver. Own a driver in several versions? Only the strongest one races — the second seat goes to the next best different driver.
4 · Compare. Every driver you flip is drawn level by level against the driver he'd replace, so you see when an upgrade gets him a seat.
Signature StarsLegendaryThese drivers assume every card is maxed out. Your drivers are lower? Tap ✎ under a driver or switch to my drivers & levels above.
Based on the drivers & levels saved in your roster. Only drivers up to Series 9 are allowed here — the others stay saved for the other guides. Tap ✎ under a driver to change a level.
1Cuppa202010000002Herald251510000001Nazar201500000152Pumpkin102000000201Ballast5100000502Instinct10000015051Downforce05010000152Instinct1000001505Unlock all 12 sections Hide plans
1 · Best setup. Shows the strongest parts Series 9 unlocks at max level — or, with the switch under the cards, the best of your own parts at your levels.
2 · Enter your garage. Open My garage (or tap ✎ under a part), tap a part to flip it and set your level with ▲ ▼. Bought a higher-series part in the shop? Add it too.
3 · Your setup. Every part is weighed at your level — a well-levelled older part often beats a low-level new one.
4 · Compare. Every part you flip is drawn against your current best level by level, so you see where one overtakes the other.
This setup assumes every part is maxed out. Your parts are lower? Tap ✎ under a part or switch to my car parts & levels above.
Based on the parts & levels saved in your garage (this browser). Only parts up to Series 9 are allowed here — higher ones stay saved for the other guides. Tap ✎ under a part to change a level.
1 · Best drivers. Shows the two strongest drivers Series 9 unlocks at max level — or, with the switch under the cards, the best two of your own drivers at your levels.
2 · Enter your drivers. Open My drivers (or tap ✎ under a driver), tap a driver to flip the card and set your level with ▲ ▼. No time to enter Legendary drivers or Special Editions? Switch them off and they're left out.
3 · One seat per driver. Own a driver in several versions? Only the strongest one races — the second seat goes to the next best different driver.
4 · Compare. Every driver you flip is drawn level by level against the driver he'd replace, so you see when an upgrade gets him a seat.
Signature StarsLegendaryThese drivers assume every card is maxed out. Your drivers are lower? Tap ✎ under a driver or switch to my drivers & levels above.
Based on the drivers & levels saved in your roster. Only drivers up to Series 9 are allowed here — the others stay saved for the other guides. Tap ✎ under a driver to change a level.
1Rainbow25200500002Genesis251000150001Handlebar250001000152Palm200010000201Hex01520000502Warrior5105000001Downforce10000500152Instinct0001001505Unlock all 12 sections Hide plans
1 · Best setup. Shows the strongest parts Series 9 unlocks at max level — or, with the switch under the cards, the best of your own parts at your levels.
2 · Enter your garage. Open My garage (or tap ✎ under a part), tap a part to flip it and set your level with ▲ ▼. Bought a higher-series part in the shop? Add it too.
3 · Your setup. Every part is weighed at your level — a well-levelled older part often beats a low-level new one.
4 · Compare. Every part you flip is drawn against your current best level by level, so you see where one overtakes the other.
This setup assumes every part is maxed out. Your parts are lower? Tap ✎ under a part or switch to my car parts & levels above.
Based on the parts & levels saved in your garage (this browser). Only parts up to Series 9 are allowed here — higher ones stay saved for the other guides. Tap ✎ under a part to change a level.
1 · Best drivers. Shows the two strongest drivers Series 9 unlocks at max level — or, with the switch under the cards, the best two of your own drivers at your levels.
2 · Enter your drivers. Open My drivers (or tap ✎ under a driver), tap a driver to flip the card and set your level with ▲ ▼. No time to enter Legendary drivers or Special Editions? Switch them off and they're left out.
3 · One seat per driver. Own a driver in several versions? Only the strongest one races — the second seat goes to the next best different driver.
4 · Compare. Every driver you flip is drawn level by level against the driver he'd replace, so you see when an upgrade gets him a seat.
Signature StarsLegendaryThese drivers assume every card is maxed out. Your drivers are lower? Tap ✎ under a driver or switch to my drivers & levels above.
Based on the drivers & levels saved in your roster. Only drivers up to Series 9 are allowed here — the others stay saved for the other guides. Tap ✎ under a driver to change a level.
1Genesis251500100002Hook152501000003Movember152500000104Handlebar251000000155Cranberry201020000006Djinn151500020007Prince102002000008Reindeer201000002009Gladiator2500150100010Merlion025001501001Handlebar251000000152Movember152500000103Tsar101500000254Palm200010000205Pumpkin020010000206Rookie Rush150010000257Iron Force200000200108Nazar015020000159Downforce105000001510Crown50000025201Downforce10500000152Ballast0100500503Warrior5050100004Self Control050005055Hex00200150506Instinct00010015051Downforce10500000152Self Control050005053Instinct0001001505Champion
1 · Best setup. Shows the strongest parts Series 12 unlocks at max level — or, with the switch under the cards, the best of your own parts at your levels.
2 · Enter your garage. Open My garage (or tap ✎ under a part), tap a part to flip it and set your level with ▲ ▼. Bought a higher-series part in the shop? Add it too.
3 · Your setup. Every part is weighed at your level — a well-levelled older part often beats a low-level new one.
4 · Compare. Every part you flip is drawn against your current best level by level, so you see where one overtakes the other.
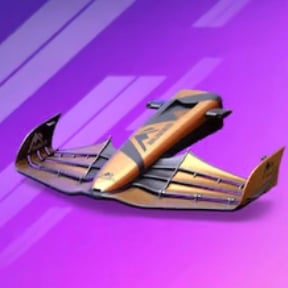
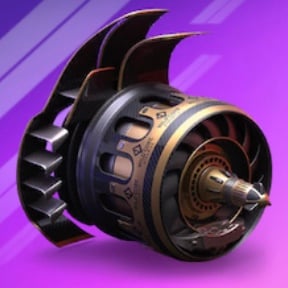

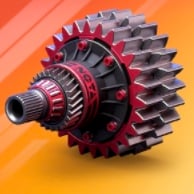
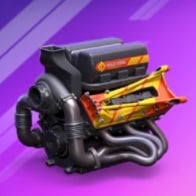
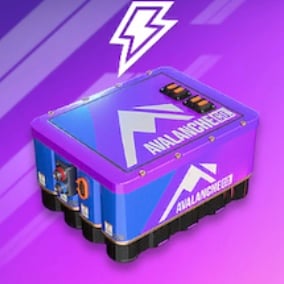
This setup assumes every part is maxed out. Your parts are lower? Tap ✎ under a part or switch to my car parts & levels above.
Based on the parts & levels saved in your garage (this browser). Only parts up to Series 12 are allowed here — higher ones stay saved for the other guides. Tap ✎ under a part to change a level.
1 · Best drivers. Shows the two strongest drivers Series 12 unlocks at max level — or, with the switch under the cards, the best two of your own drivers at your levels.
2 · Enter your drivers. Open My drivers (or tap ✎ under a driver), tap a driver to flip the card and set your level with ▲ ▼. No time to enter Legendary drivers or Special Editions? Switch them off and they're left out.
3 · One seat per driver. Own a driver in several versions? Only the strongest one races — the second seat goes to the next best different driver.
4 · Compare. Every driver you flip is drawn level by level against the driver he'd replace, so you see when an upgrade gets him a seat.
 Signature Stars
 Signature Stars
These drivers assume every card is maxed out. Your drivers are lower? Tap ✎ under a driver or switch to my drivers & levels above.
Based on the drivers & levels saved in your roster. Only drivers up to Series 12 are allowed here — the others stay saved for the other guides. Tap ✎ under a driver to change a level.
1Genesis251500100002Hook152501000003Movember152500000104Handlebar251000000155Cranberry201020000006Djinn151500020007Prince102002000008Reindeer201000002009Gladiator2500150100010Merlion025001501001Handlebar251000000152Movember152500000103Tsar101500000254Palm200010000205Pumpkin020010000206Rookie Rush150010000257Iron Force200000200108Nazar015020000159Downforce105000001510Crown50000025201Downforce10500000152Ballast0100500503Warrior5050100004Self Control050005055Hex00200150506Instinct00010015051Downforce10500000152Self Control050005053Instinct0001001505
1 · Best setup. Shows the strongest parts Series 12 unlocks at max level — or, with the switch under the cards, the best of your own parts at your levels.
2 · Enter your garage. Open My garage (or tap ✎ under a part), tap a part to flip it and set your level with ▲ ▼. Bought a higher-series part in the shop? Add it too.
3 · Your setup. Every part is weighed at your level — a well-levelled older part often beats a low-level new one.
4 · Compare. Every part you flip is drawn against your current best level by level, so you see where one overtakes the other.
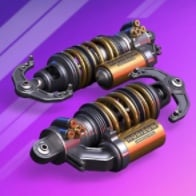
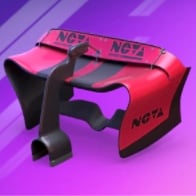
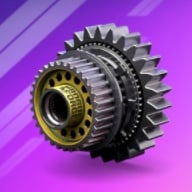
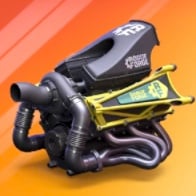
This setup assumes every part is maxed out. Your parts are lower? Tap ✎ under a part or switch to my car parts & levels above.
Based on the parts & levels saved in your garage (this browser). Only parts up to Series 12 are allowed here — higher ones stay saved for the other guides. Tap ✎ under a part to change a level.
1 · Best drivers. Shows the two strongest drivers Series 12 unlocks at max level — or, with the switch under the cards, the best two of your own drivers at your levels.
2 · Enter your drivers. Open My drivers (or tap ✎ under a driver), tap a driver to flip the card and set your level with ▲ ▼. No time to enter Legendary drivers or Special Editions? Switch them off and they're left out.
3 · One seat per driver. Own a driver in several versions? Only the strongest one races — the second seat goes to the next best different driver.
4 · Compare. Every driver you flip is drawn level by level against the driver he'd replace, so you see when an upgrade gets him a seat.
Signature StarsSignature StarsThese drivers assume every card is maxed out. Your drivers are lower? Tap ✎ under a driver or switch to my drivers & levels above.
Based on the drivers & levels saved in your roster. Only drivers up to Series 12 are allowed here — the others stay saved for the other guides. Tap ✎ under a driver to change a level.
1Dragon201500000152Ghoulfuel251000001503Glitz152000015004Unstoppable251000150005Rookie Reload52500020006Rooster201002000007Taurus52500200008Butterfly02500005209Eternal Flame2500015001010Feral250000010151Dragon201500000152Butterfly02500005203Feral250000010154Pretzel015000010255Eternal Flame250001500106Frost010015000257Iron Force020200000108Dead Fast02000250059Rookie Rush0015100002510Surf02002500051Hex20000150502Instinct01501000053Warrior5050100004Self Control050005055Downforce00100050156Ballast0005010501Instinct01501000052Downforce00100050153Self Control05000505
1 · Best setup. Shows the strongest parts Series 12 unlocks at max level — or, with the switch under the cards, the best of your own parts at your levels.
2 · Enter your garage. Open My garage (or tap ✎ under a part), tap a part to flip it and set your level with ▲ ▼. Bought a higher-series part in the shop? Add it too.
3 · Your setup. Every part is weighed at your level — a well-levelled older part often beats a low-level new one.
4 · Compare. Every part you flip is drawn against your current best level by level, so you see where one overtakes the other.
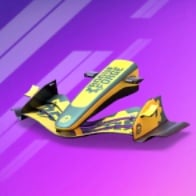
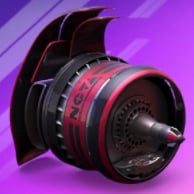
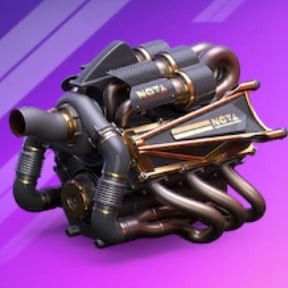
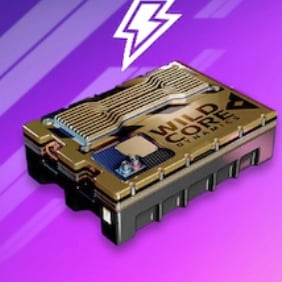
This setup assumes every part is maxed out. Your parts are lower? Tap ✎ under a part or switch to my car parts & levels above.
Based on the parts & levels saved in your garage (this browser). Only parts up to Series 12 are allowed here — higher ones stay saved for the other guides. Tap ✎ under a part to change a level.
1 · Best drivers. Shows the two strongest drivers Series 12 unlocks at max level — or, with the switch under the cards, the best two of your own drivers at your levels.
2 · Enter your drivers. Open My drivers (or tap ✎ under a driver), tap a driver to flip the card and set your level with ▲ ▼. No time to enter Legendary drivers or Special Editions? Switch them off and they're left out.
3 · One seat per driver. Own a driver in several versions? Only the strongest one races — the second seat goes to the next best different driver.
4 · Compare. Every driver you flip is drawn level by level against the driver he'd replace, so you see when an upgrade gets him a seat.
Signature StarsSignature StarsThese drivers assume every card is maxed out. Your drivers are lower? Tap ✎ under a driver or switch to my drivers & levels above.
Based on the drivers & levels saved in your roster. Only drivers up to Series 12 are allowed here — the others stay saved for the other guides. Tap ✎ under a driver to change a level.
1Rainbow25200500002Genesis251000150003Vice251000015004Tulip102000002005Champion025010015006Dead Fast02500020057Eclipse025150001008Full Send02550020009Gladiator2500150100010Handlebar250001000151Handlebar250001000152Palm200010000203Rookie Rush150010000254Eagle015000015205Tsar100001500256Livewire01500000207Dead Fast02500020058Iron Force200000200109Crown500000252010Eternal Flame015250000101Hex01520000502Warrior5105000003Downforce10000500154Instinct00010015055Ballast0005100506Self Control000055051Downforce10000500152Instinct00010015053Self Control00005505
1 · Best setup. Shows the strongest parts Series 12 unlocks at max level — or, with the switch under the cards, the best of your own parts at your levels.
2 · Enter your garage. Open My garage (or tap ✎ under a part), tap a part to flip it and set your level with ▲ ▼. Bought a higher-series part in the shop? Add it too.
3 · Your setup. Every part is weighed at your level — a well-levelled older part often beats a low-level new one.
4 · Compare. Every part you flip is drawn against your current best level by level, so you see where one overtakes the other.
This setup assumes every part is maxed out. Your parts are lower? Tap ✎ under a part or switch to my car parts & levels above.
Based on the parts & levels saved in your garage (this browser). Only parts up to Series 12 are allowed here — higher ones stay saved for the other guides. Tap ✎ under a part to change a level.
1 · Best drivers. Shows the two strongest drivers Series 12 unlocks at max level — or, with the switch under the cards, the best two of your own drivers at your levels.
2 · Enter your drivers. Open My drivers (or tap ✎ under a driver), tap a driver to flip the card and set your level with ▲ ▼. No time to enter Legendary drivers or Special Editions? Switch them off and they're left out.
3 · One seat per driver. Own a driver in several versions? Only the strongest one races — the second seat goes to the next best different driver.
4 · Compare. Every driver you flip is drawn level by level against the driver he'd replace, so you see when an upgrade gets him a seat.
Signature StarsSignature StarsThese drivers assume every card is maxed out. Your drivers are lower? Tap ✎ under a driver or switch to my drivers & levels above.
Based on the drivers & levels saved in your roster. Only drivers up to Series 12 are allowed here — the others stay saved for the other guides. Tap ✎ under a driver to change a level.
1Christmas102000200002Cranberry201020000001Feral250000010152Pumpkin020010000201Hex20000150502Ballast0100500501Downforce05100000152Self Control05000505Unlock all 12 sections Hide plans
1 · Best setup. Shows the strongest parts Series 12 unlocks at max level — or, with the switch under the cards, the best of your own parts at your levels.
2 · Enter your garage. Open My garage (or tap ✎ under a part), tap a part to flip it and set your level with ▲ ▼. Bought a higher-series part in the shop? Add it too.
3 · Your setup. Every part is weighed at your level — a well-levelled older part often beats a low-level new one.
4 · Compare. Every part you flip is drawn against your current best level by level, so you see where one overtakes the other.
This setup assumes every part is maxed out. Your parts are lower? Tap ✎ under a part or switch to my car parts & levels above.
Based on the parts & levels saved in your garage (this browser). Only parts up to Series 12 are allowed here — higher ones stay saved for the other guides. Tap ✎ under a part to change a level.
1 · Best drivers. Shows the two strongest drivers Series 12 unlocks at max level — or, with the switch under the cards, the best two of your own drivers at your levels.
2 · Enter your drivers. Open My drivers (or tap ✎ under a driver), tap a driver to flip the card and set your level with ▲ ▼. No time to enter Legendary drivers or Special Editions? Switch them off and they're left out.
3 · One seat per driver. Own a driver in several versions? Only the strongest one races — the second seat goes to the next best different driver.
4 · Compare. Every driver you flip is drawn level by level against the driver he'd replace, so you see when an upgrade gets him a seat.
Signature StarsSignature StarsThese drivers assume every card is maxed out. Your drivers are lower? Tap ✎ under a driver or switch to my drivers & levels above.
Based on the drivers & levels saved in your roster. Only drivers up to Series 12 are allowed here — the others stay saved for the other guides. Tap ✎ under a driver to change a level.
1Cuppa202010000002Herald251510000003Prince202001000004Timeless152500100005Hook102501500006Kawaii152000001507Nazar201500000158Pumpkin102000000209Confetti2501000015010Launch Pad250000151001Nazar201500000152Pumpkin102000000203Frost150000100254Tsar015010000255Movember025015000106Rookie Rush100015000257Palm100020000208Surf25000020059Handlebar0100250001510Pretzel000001510251Ballast5100000502Instinct10000015053Downforce05010000154Self Control050005055Hex00200150506Warrior0055100001Downforce05010000152Instinct10000015053Self Control05000505
1 · Best setup. Shows the strongest parts Series 12 unlocks at max level — or, with the switch under the cards, the best of your own parts at your levels.
2 · Enter your garage. Open My garage (or tap ✎ under a part), tap a part to flip it and set your level with ▲ ▼. Bought a higher-series part in the shop? Add it too.
3 · Your setup. Every part is weighed at your level — a well-levelled older part often beats a low-level new one.
4 · Compare. Every part you flip is drawn against your current best level by level, so you see where one overtakes the other.
This setup assumes every part is maxed out. Your parts are lower? Tap ✎ under a part or switch to my car parts & levels above.
Based on the parts & levels saved in your garage (this browser). Only parts up to Series 12 are allowed here — higher ones stay saved for the other guides. Tap ✎ under a part to change a level.
1 · Best drivers. Shows the two strongest drivers Series 12 unlocks at max level — or, with the switch under the cards, the best two of your own drivers at your levels.
2 · Enter your drivers. Open My drivers (or tap ✎ under a driver), tap a driver to flip the card and set your level with ▲ ▼. No time to enter Legendary drivers or Special Editions? Switch them off and they're left out.
3 · One seat per driver. Own a driver in several versions? Only the strongest one races — the second seat goes to the next best different driver.
4 · Compare. Every driver you flip is drawn level by level against the driver he'd replace, so you see when an upgrade gets him a seat.
Signature StarsSignature StarsThese drivers assume every card is maxed out. Your drivers are lower? Tap ✎ under a driver or switch to my drivers & levels above.
Based on the drivers & levels saved in your roster. Only drivers up to Series 12 are allowed here — the others stay saved for the other guides. Tap ✎ under a driver to change a level.
1Cuppa202010000002Herald251510000001Nazar201500000152Pumpkin102000000201Ballast5100000502Instinct10000015051Downforce05010000152Instinct1000001505Unlock all 12 sections Hide plans
1 · Best setup. Shows the strongest parts Series 12 unlocks at max level — or, with the switch under the cards, the best of your own parts at your levels.
2 · Enter your garage. Open My garage (or tap ✎ under a part), tap a part to flip it and set your level with ▲ ▼. Bought a higher-series part in the shop? Add it too.
3 · Your setup. Every part is weighed at your level — a well-levelled older part often beats a low-level new one.
4 · Compare. Every part you flip is drawn against your current best level by level, so you see where one overtakes the other.
This setup assumes every part is maxed out. Your parts are lower? Tap ✎ under a part or switch to my car parts & levels above.
Based on the parts & levels saved in your garage (this browser). Only parts up to Series 12 are allowed here — higher ones stay saved for the other guides. Tap ✎ under a part to change a level.
1 · Best drivers. Shows the two strongest drivers Series 12 unlocks at max level — or, with the switch under the cards, the best two of your own drivers at your levels.
2 · Enter your drivers. Open My drivers (or tap ✎ under a driver), tap a driver to flip the card and set your level with ▲ ▼. No time to enter Legendary drivers or Special Editions? Switch them off and they're left out.
3 · One seat per driver. Own a driver in several versions? Only the strongest one races — the second seat goes to the next best different driver.
4 · Compare. Every driver you flip is drawn level by level against the driver he'd replace, so you see when an upgrade gets him a seat.
Signature StarsSignature StarsThese drivers assume every card is maxed out. Your drivers are lower? Tap ✎ under a driver or switch to my drivers & levels above.
Based on the drivers & levels saved in your roster. Only drivers up to Series 12 are allowed here — the others stay saved for the other guides. Tap ✎ under a driver to change a level.
1Rainbow25200500002Genesis251000150001Handlebar250001000152Palm200010000201Hex01520000502Warrior5105000001Downforce10000500152Instinct0001001505Unlock all 12 sections Hide plans
1 · Best setup. Shows the strongest parts Series 12 unlocks at max level — or, with the switch under the cards, the best of your own parts at your levels.
2 · Enter your garage. Open My garage (or tap ✎ under a part), tap a part to flip it and set your level with ▲ ▼. Bought a higher-series part in the shop? Add it too.
3 · Your setup. Every part is weighed at your level — a well-levelled older part often beats a low-level new one.
4 · Compare. Every part you flip is drawn against your current best level by level, so you see where one overtakes the other.
This setup assumes every part is maxed out. Your parts are lower? Tap ✎ under a part or switch to my car parts & levels above.
Based on the parts & levels saved in your garage (this browser). Only parts up to Series 12 are allowed here — higher ones stay saved for the other guides. Tap ✎ under a part to change a level.
1 · Best drivers. Shows the two strongest drivers Series 12 unlocks at max level — or, with the switch under the cards, the best two of your own drivers at your levels.
2 · Enter your drivers. Open My drivers (or tap ✎ under a driver), tap a driver to flip the card and set your level with ▲ ▼. No time to enter Legendary drivers or Special Editions? Switch them off and they're left out.
3 · One seat per driver. Own a driver in several versions? Only the strongest one races — the second seat goes to the next best different driver.
4 · Compare. Every driver you flip is drawn level by level against the driver he'd replace, so you see when an upgrade gets him a seat.
Signature StarsSignature StarsThese drivers assume every card is maxed out. Your drivers are lower? Tap ✎ under a driver or switch to my drivers & levels above.
Based on the drivers & levels saved in your roster. Only drivers up to Series 12 are allowed here — the others stay saved for the other guides. Tap ✎ under a driver to change a level.
1Genesis251500100002Hook152501000003Movember152500000104Handlebar251000000155Cranberry201020000006Djinn151500020007Prince102002000008Reindeer201000002009Gladiator2500150100010Merlion025001501001Handlebar251000000152Movember152500000103Tsar101500000254Palm200010000205Pumpkin020010000206Rookie Rush150010000257Iron Force200000200108Nazar015020000159Downforce105000001510Crown50000025201Downforce10500000152Ballast0100500503Warrior5050100004Self Control050005055Hex00200150506Instinct00010015051Downforce10500000152Self Control050005053Instinct0001001505 Keep AllClash one tap awayAdd it to your home screen and it opens full screen, like an app.