
Upgrading your clubs is the single most important thing that needs a long-term strategy in Golf Clash because it will cost a ton of Coins and requires time – if you do favor the wrong clubs, you can easily get into a dead-end and might need to restart.
What we did was taking all different clubs and take their stats and weight them in priorities to show you the important clubs you need to work on. We also give a recommended upgrade order for all clubs that you should follow that will fit into your progress in Golf Clash and make sure that you have the best clubs in the different stages of the game.
Club Tier List General
Stats are super important when it comes to your club selection in Golf Clash, but there are some things that I find are not addressed well in other tier lists.
Let’s take the power (how far you can hit with a certain club) as an example here. When you use a driver you need to gain distance in almost all the cases. More distance let you get into a better position for your second hit and is for a driver a very important aspect. When we talk about a short iron, distance is not that important anymore as you’re closer to the green and might need backspin a lot more to adjust the speed your ball has when approaching the hole.
For that reason we prioritize the different stats in the tier list like that:
- Driver: high prior on Power (distance) and Top Spin, Accuracy and Curl are bonus here
- Wood: also Power is very important here and the Ball Guide as well. Back Spin/Accuracy and Curl are secondary important metrics
- Long Iron: Ball Guide and Back Spin are the most important stats here, Accuracy is secondary important
- Short Iron: Accuracy and Ball Guide is important here
This gives you a general idea how to rate your clubs.
Best Club Tier List
Now let’s take a look at the different clubs in Golf Clash in our tier list.
Caution! While most tier lists and ranking simply look at the different stats, we also took into account in which order you normally would have your clubs, so we think it’s a lot better to give you a general recommendation what clubs to work on rather than telling the raw stats.
For example, no doubt a maxed Apocalypse is the best driver in the game, but at Level 1 the Apocalypse is nor even close to what a maxed Extra Mile can do… and it’s more likely you have the maxed Extra Mile than a club that you might not even max out in years in Golf Clash.
For those of you that like tables and stats, we have all the stats below in the tables where you can check them.
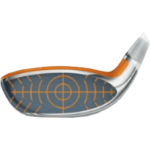
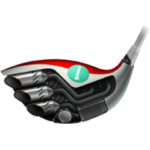
Best Driver In Golf Clash & Priority
1st Priority
You will start with the Rocket early on but you should swap that out and not upgrade anymore once you have the Extra Mile.
The Extra Mile is the bread-and-butter driver you will use for such a long time so upgrade it whenever you can. The only downside of the Extra Mile is the backspin and curl.
As you make your path through the Tours, you will start to get Quarterback cards as well. The Quarterback fill in that gap and can be your driver when you need to do very long drives and use curl/backspin (be careful though, if you need a lot of topspin the Extra Mile is still your pick). This is your setup for a long time.

![]()
2nd Priority
When you start getting into the Expert Tournaments and also into the higher Tours, Thor’s Hammer and/or Apocalypse will be mandatory and what most players run there. Keep in mind that they should be at least Level 3, better Level 4 to be good enough to substitute your Extra Mile and Quarterback!
Drivers like the Big Topper are great for those extremely long drives and The Rock can make magic drives with curl and accuracy, but for average players nor really worth investing and going after unless you really want to hit Expert Level.
![]()
3rd Priority
For the last stages and towards the highest tournaments in Golf Clash, you need the Apocalypse but you need at least Level 3 to use it!
This is the driver you will now have to invest everything into and it’s the best one (also the hardest to obtain and level, obviously).
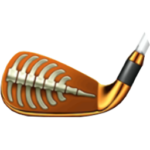
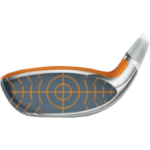
Best Woods In Golf Clash & Priority
1st Priority

The worst wood club you have and probably will upgrade is the Viper. Ignore The Horizon although it’s purple. The Viper is not great but also not awful and the only downside is that you will lack top spin which is annoying in several cases but alright for the first Tours.
![]()
2nd Priority
Once you get your hands on The Big Dawg you have the second wood club you need and it will give you the chance to play the higher distance 2nd hits with topspin and also distance needed to get closer to the green. You’ll find a good use for it so I’d say maxing it out is no issue and you won’t regret it.

The Hammerhead is a club to ignore and The Guardian can be interesting in some cases but for newer players I’d recommend skipping them.
![]()
3rd Priority
The ultimate one to get then is The Sniper. An amazing wood club in Golf Clash that you will use a long time and for a lot of holes, especially in Tournaments. Max it, use it. I also would say you can substitute The Cataclysm with it and it’s blue so getting cards to upgrade is quite easy. Well enough for most players! Keep in mind to have it at least Level 5, better Level 6 before you substitute the other wood clubs in your bag.
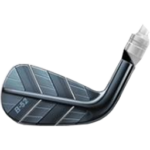
Best Long Irons In Golf Clash & Priority
1st Priority
Compared to wood and driver you will not use long irons that much but they have their uses. In general, you can keep it quite simple here without going too crazy.
You’ll start with The Backbone and that’s the long iron that makes a lot of sense with solid stats, only spin and curl are bad. Still, once you get it at Level 9 it’s a solid pick that you can use for quite some time. Parallel to that, also work on The Goliath so you have a long iron to use in Gold Clash of you need the spin or curl. It has horrible accuracy but you will get used to it and can use this combo through the mid-game of Gold Clash without problems.

![]()
2nd Priority
If you have the resources and cards at hand, working on the B52 or The Grizzly wouldn’t be a bad idea long-term but something that you don’t need to think about in early- nor in mid-game in Golf Clash and it’s for the highest Tournament Tiers or highest Tours only. The B52 should also be Level 7 or higher before it makes sense to swap it in for The Goliath/Backbone.

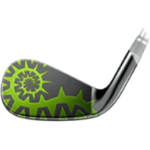
Best Short Irons In Golf Clash & Priority
1st Priority
This is a very clear thing and you can start with whatever short iron you will get; normally that’s The Apache or The Kingfisher and you should upgrade it as much as you need it until you unlock The Thorn. This is the short iron that you will be running so much, and with the amazing backspin, you can back great landings on the green and approach the hole. You will use it in the end-game in Golf Clash as well.
![]()
2nd Priority
Along with it, you need to work on The Hornet which is the counterpart with topspin and accuracy. So one of those two fits perfectly in your bag and there’s no need to run any other short irons in tournaments in the future. The higher ones are nothing more than a small little bit of extra stats that you don’t need.
Best Other Clubs In Golf Clash
For the rough irons, sand wedges etc. I don’t see a tier list really helpful because their stats don’t matter that much that it makes sense to put them into a tier list.
Work on those 4 club categories first before you think about putting extra effort into rough irons or sand wedges. Use the one you can upgrade and spend coins occasionally, the ones above are your main priority!
Drivers Stats:
| Club | Sum | Lvl | PWR | ACC | T-Spin | B-Spin | CRL | GUIDE |
|---|---|---|---|---|---|---|---|---|
 |
255 | 8 | 240 | 90 | 90 | 80 | 100 | 4.0 |
 |
254 | 8 | 235 | 100 | 98 | 100 | 50 | 4.5 |
|
249 | 7 | 240 | 84 | 88 | 76 | 98 | 3.9 |
|
246 | 7 | 232 | 92 | 98 | 97 | 41 | 4.4 |
 |
241 | 8 | 230 | 60 | 100 | 60 | 100 | 4.1 |
|
233 | 6 | 240 | 75 | 76 | 76 | 98 | 3.0 |
|
229 | 7 | 225 | 51 | 100 | 54 | 83 | 4.0 |
 |
228 | 9 | 232 | 100 | 55 | 60 | 98 | 4.4 |
|
224 | 6 | 219 | 51 | 100 | 43 | 83 | 3.1 |
|
222 | 6 | 232 | 64 | 85 | 97 | 41 | 4.1 |
|
221 | 8 | 231 | 100 | 47 | 59 | 96 | 4.4 |
 |
221 | 10 | 218 | 100 | 55 | 72 | 86 | 4.5 |
|
220 | 5 | 240 | 75 | 64 | 42 | 92 | 3.0 |
|
211 | 7 | 226 | 100 | 42 | 59 | 79 | 4.4 |
 |
211 | 9 | 237 | 45 | 85 | 50 | 50 | 3.6 |
|
210 | 5 | 217 | 34 | 100 | 43 | 65 | 3.1 |
|
209 | 9 | 218 | 100 | 41 | 72 | 86 | 4.0 |
|
205 | 5 | 232 | 64 | 67 | 75 | 41 | 3.8 |
|
204 | 8 | 214 | 100 | 41 | 45 | 82 | 4.0 |
|
196 | 8 | 236 | 45 | 67 | 48 | 47 | 3.6 |
 |
194 | 10 | 211 | 90 | 37 | 98 | 54 | 4.2 |
|
193 | 6 | 226 | 94 | 25 | 59 | 68 | 4.4 |
|
192 | 7 | 214 | 100 | 31 | 45 | 67 | 3.8 |
|
185 | 9 | 206 | 83 | 37 | 70 | 54 | 4.2 |
|
181 | 7 | 234 | 45 | 50 | 48 | 47 | 3.0 |
|
172 | 8 | 204 | 83 | 23 | 52 | 54 | 4.2 |
|
168 | 6 | 234 | 29 | 50 | 48 | 30 | 2.8 |
|
164 | 7 | 204 | 83 | 18 | 52 | 44 | 3.6 |
| Beginner Driver | 90 | 1 | 190 | 10 | 0 | 0 | 5 | 2.0 |
Woods Stats:
| Club | Sum | Lvl | PWR | ACC | T-Spin | B-Spin | CRL | GUIDE |
|---|---|---|---|---|---|---|---|---|
 |
436 | 8 | 176 | 100 | 85 | 100 | 100 | 4.3 |
 |
423 | 8 | 180 | 90 | 100 | 85 | 100 | 4.3 |
|
413 | 7 | 175 | 100 | 79 | 80 | 98 | 4.1 |
 |
409 | 10 | 172 | 100 | 68 | 73 | 95 | 4.5 |
|
407 | 7 | 180 | 80 | 93 | 76 | 100 | 4.3 |
|
396 | 9 | 170 | 100 | 51 | 73 | 85 | 4.5 |
 |
394 | 9 | 179 | 95 | 35 | 100 | 75 | 3.9 |
|
388 | 6 | 175 | 95 | 79 | 73 | 77 | 4.1 |
|
384 | 8 | 166 | 100 | 45 | 62 | 85 | 4.5 |
|
381 | 8 | 179 | 90 | 31 | 100 | 67 | 3.8 |
|
379 | 6 | 180 | 60 | 85 | 76 | 100 | 3.8 |
 |
378 | 8 | 179 | 65 | 100 | 50 | 90 | 4.7 |
|
371 | 5 | 170 | 95 | 79 | 60 | 77 | 3.9 |
|
363 | 7 | 166 | 100 | 39 | 46 | 74 | 4.5 |
|
363 | 7 | 175 | 90 | 24 | 100 | 48 | 3.8 |
|
356 | 5 | 180 | 60 | 71 | 56 | 100 | 3.6 |
 |
354 | 9 | 180 | 60 | 85 | 60 | 100 | 3.2 |
|
340 | 6 | 174 | 78 | 24 | 100 | 48 | 3.2 |
|
336 | 8 | 180 | 56 | 80 | 50 | 100 | 2.9 |
 |
335 | 10 | 170 | 72 | 29 | 62 | 67 | 3.9 |
|
328 | 7 | 178 | 45 | 100 | 31 | 85 | 3.9 |
|
313 | 9 | 170 | 67 | 29 | 51 | 67 | 3.4 |
|
310 | 7 | 180 | 44 | 80 | 44 | 100 | 2.3 |
|
297 | 6 | 178 | 31 | 100 | 31 | 64 | 3.7 |
|
289 | 6 | 180 | 25 | 67 | 44 | 95 | 2.3 |
|
288 | 8 | 170 | 56 | 29 | 51 | 51 | 3.2 |
|
288 | 5 | 173 | 31 | 94 | 24 | 64 | 3.7 |
|
270 | 7 | 170 | 56 | 17 | 35 | 46 | 3.2 |
| Beginner Wood | 143 | 1 | 160 | 10 | 0 | 0 | 5 | 2.0 |
Long Iron Stats:
| Club | Sum | Lvl | PWR | ACC | T-Spin | B-Spin | CRL | GUIDE |
|---|---|---|---|---|---|---|---|---|
 |
422 | 8 | 135 | 92 | 100 | 100 | 100 | 3.5 |
 |
411 | 8 | 128 | 90 | 40 | 100 | 100 | 4.0 |
 |
408 | 9 | 129 | 100 | 50 | 70 | 100 | 4.4 |
|
405 | 7 | 135 | 81 | 100 | 100 | 100 | 3.1 |
|
400 | 8 | 126 | 100 | 45 | 64 | 100 | 4.4 |
|
394 | 7 | 126 | 81 | 28 | 100 | 98 | 3.8 |
 |
389 | 8 | 135 | 100 | 65 | 65 | 65 | 4.5 |
 |
380 | 9 | 135 | 55 | 100 | 70 | 100 | 3.9 |
|
379 | 6 | 134 | 60 | 100 | 100 | 100 | 2.7 |
|
377 | 7 | 126 | 100 | 38 | 45 | 90 | 4.4 |
|
374 | 7 | 135 | 100 | 55 | 58 | 56 | 4.5 |
|
368 | 8 | 135 | 52 | 100 | 66 | 90 | 3.9 |
|
369 | 6 | 126 | 60 | 12 | 100 | 91 | 3.8 |
 |
367 | 10 | 124 | 56 | 66 | 92 | 81 | 3.9 |
|
355 | 5 | 134 | 60 | 100 | 100 | 82 | 2.2 |
|
355 | 6 | 126 | 96 | 38 | 45 | 82 | 3.8 |
|
347 | 6 | 135 | 98 | 55 | 45 | 56 | 3.8 |
|
347 | 5 | 125 | 60 | 12 | 83 | 91 | 3.4 |
 |
346 | 10 | 127 | 92 | 39 | 67 | 57 | 3.6 |
|
343 | 9 | 124 | 56 | 66 | 82 | 65 | 3.7 |
|
340 | 7 | 135 | 52 | 100 | 60 | 71 | 3.5 |
|
329 | 8 | 120 | 51 | 66 | 82 | 65 | 3.4 |
|
327 | 5 | 135 | 98 | 33 | 38 | 43 | 3.8 |
|
322 | 9 | 127 | 82 | 39 | 67 | 41 | 3.4 |
|
318 | 4 | 125 | 60 | 12 | 70 | 72 | 3.2 |
|
317 | 7 | 120 | 51 | 48 | 71 | 65 | 3.4 |
|
312 | 6 | 135 | 34 | 100 | 47 | 65 | 3.5 |
|
306 | 8 | 123 | 76 | 39 | 56 | 41 | 3.4 |
|
289 | 7 | 120 | 76 | 39 | 51 | 41 | 2.9 |
| Beginner Long Iron | 141 | 1 | 115 | 10 | 0 | 0 | 5 | 2.0 |
Short Iron Stats
| Club | Sum | Lvl | PWR | ACC | T-Spin | B-Spin | CRL | GUIDE |
|---|---|---|---|---|---|---|---|---|
| The Falcon | 427 | 8 | 90 | 95 | 100 | 80 | 100 | 4.5 |
| The Kingfisher | 421 | 8 | 84 | 100 | 42 | 90 | 100 | 4.7 |
| The Falcon | 407 | 7 | 88 | 79 | 90 | 78 | 98 | 4.5 |
| The Kingfisher | 392 | 7 | 83 | 94 | 42 | 67 | 100 | 4.4 |
| The Hornet | 390 | 9 | 88 | 100 | 80 | 52 | 95 | 4.1 |
| The Claw | 387 | 10 | 87 | 75 | 73 | 97 | 100 | 3.2 |
| The Thorn | 383 | 9 | 90 | 57 | 60 | 100 | 75 | 4.4 |
| The Hornet | 379 | 8 | 88 | 96 | 68 | 52 | 88 | 4.1 |
| The Falcon | 378 | 6 | 88 | 79 | 80 | 78 | 79 | 3.9 |
| The Kingfisher | 375 | 6 | 79 | 88 | 42 | 67 | 100 | 4.0 |
| The Claw | 374 | 9 | 86 | 66 | 51 | 97 | 100 | 3.2 |
| The Thorn | 372 | 8 | 90 | 57 | 50 | 100 | 70 | 4.2 |
| The Falcon | 359 | 5 | 85 | 64 | 80 | 72 | 79 | 3.9 |
| The Thorn | 356 | 7 | 89 | 57 | 33 | 100 | 70 | 3.7 |
| The Claw | 355 | 8 | 86 | 54 | 51 | 87 | 100 | 3.1 |
| The Hornet | 352 | 7 | 88 | 96 | 68 | 36 | 79 | 3.7 |
| The Apache | 349 | 9 | 90 | 55 | 100 | 55 | 90 | 3.5 |
| The Claw | 344 | 7 | 82 | 54 | 36 | 83 | 100 | 3.1 |
| The Kingfisher | 343 | 5 | 79 | 88 | 42 | 61 | 75 | 3.6 |
| The Runner | 339 | 10 | 82 | 66 | 97 | 37 | 90 | 3.7 |
| The Hornet | 334 | 6 | 86 | 96 | 68 | 30 | 79 | 3.2 |
| The Thorn | 324 | 6 | 89 | 52 | 33 | 100 | 44 | 3.3 |
| The Runner | 316 | 9 | 82 | 66 | 97 | 28 | 83 | 3.2 |
| The Apache | 299 | 8 | 90 | 32 | 94 | 36 | 84 | 2.9 |
| The Apache | 270 | 7 | 90 | 32 | 77 | 36 | 57 | 2.7 |
| The Runner | 269 | 8 | 82 | 53 | 97 | 23 | 38 | 3.2 |
| The Runner | 267 | 7 | 81 | 53 | 97 | 23 | 46 | 2.9 |
| The Apache | 252 | 6 | 90 | 27 | 51 | 25 | 57 | 2.7 |
| The Runner | 179 | 2 | 75 | 24 | 90 | 0 | 31 | 1.5 |
| The Apache | 154 | 1 | 84 | 4 | 28 | 0 | 25 | 1.5 |
| The Runner | 154 | 1 | 75 | 20 | 90 | 0 | 10 | 1.2 |
| Beginner Short Iron | 137 | 1 | 75 | 10 | 0 | 0 | 5 | 2.0 |


I love the blog post! I’m looking forward to the next one.
Why you prefer Tsunami more then B52 on level 8???
I wouldn’t. B52 has ball guide, accuracy and back spin. Tsunami lacks ball guide at only 3.5. I think the power is slightly better for tsunami, and it has max backspin, but guide is really important so I use B52
my girlfriend is great and she can be a little better if she had the best of everything how can we buy them now
I am fairly new and am still practicing by playing 1 on 1. I want “The Big Dog” club but under the card(?) it shows 3/4. Collect 1 more to upgrade. I have no idea what “1 more” is. Please tell me and how I can get it. Do look forward to tournament play.
TL
Some good info here, but a few things I would add. I am only farming Tour 5 right now.
1. Ball guide. This is why one, including me may prefer the Thorn over the Hornet. Can go either way on this though, but ball guide is a very helpful stat for wedges and short irons.
2. The difference between the wedges can be very helpful. The Firefly for example has helped me get a lot of shots in the hole I would have had more difficulty with with other wedges. The ball-guide, and accuracy from it is very helpful. The Dart is also pretty good. For Sand Wedges I like The Malibu best due to having decent power, accuracy, and ball guide. This is also why I like the Razor best for Rough Irons.