

If you want to suceed with your BMW M5 CS in CSR3, there are a few fundamental things you need to do right in terms of MOD Parts but also very particular ways how to drive your car on the different tracks of the game. Please also refer to our current ranking list of all cars in CSR3. Below you will find the best tune setup for your car and the best shift strategy for every track + more tips how to get the most out of your car.
Setup
There is 3 things that make or break your car in CSR3, and those are 1) the MOD Parts you use, 2) how well you can make a perfect start and 3) if you can make the perfect shift strategy on track. All of which you will find below.
Best MOD Parts For BMW M5 CS
MOD Parts have nothing to do with cheating, they are parts you can install on your car and that will give you more base stats and at higher rarities even additional abilities like more grip when wheelspin, lower drag or even double NOS. Every car and car class interacts different but we tested them individually on track and this is how well they all work:


⚠️ Here are a few VERY IMPORTANT THINGS to mind with MOD Parts:
First of all make sure you mod parts are at least blue rarity or higher as you primarily want the perk. If they are green you can just toss in whatever you feel. The Bonus Ability (the one that activates dependign on your car class or car itself) is not that amazing. Cool if it fits, but if not don’t sweat it, the stats on it and the Perk ability is 90% of what makes your MOD part. Speaking of stats, please ALWAYS check rarity. Higher rarity makes on some parts a massive difference on the stats you gain.
Perfect Start With The BMW M5 CS Every Time
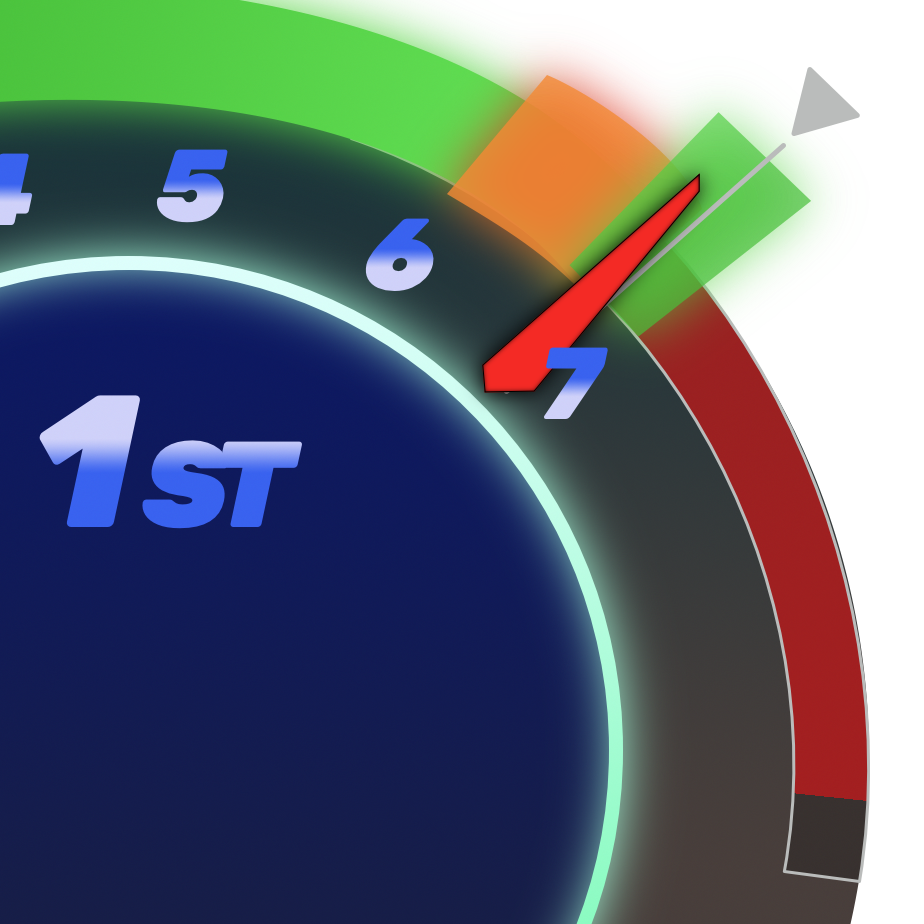
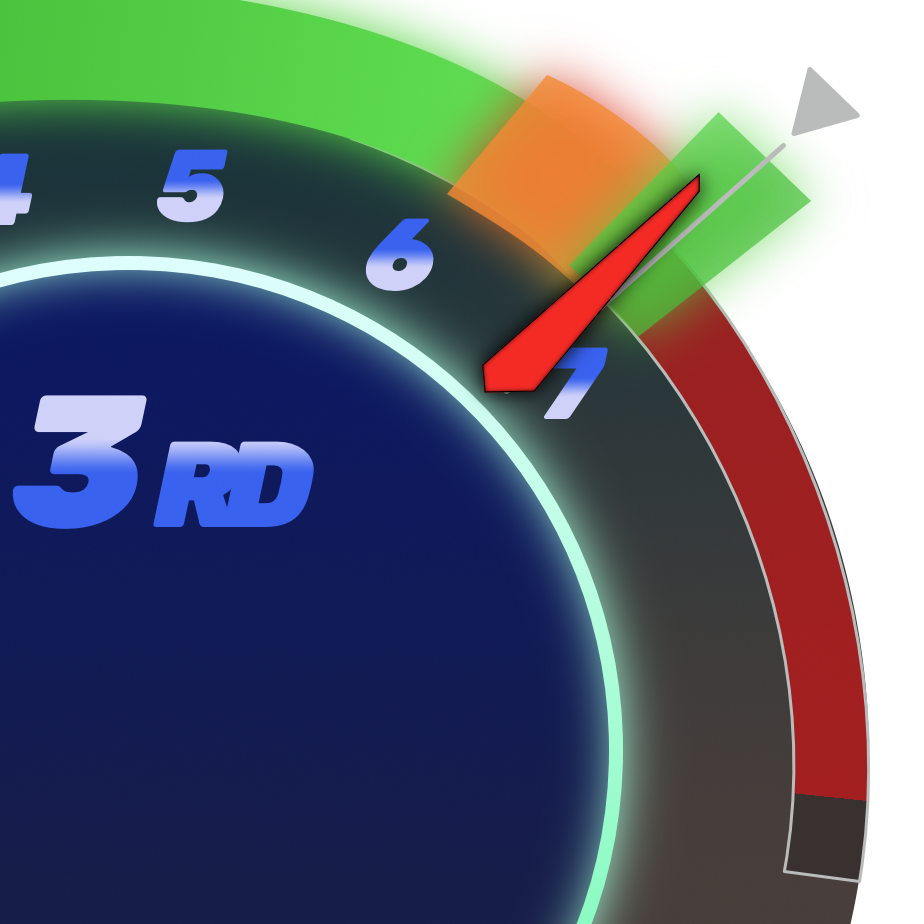
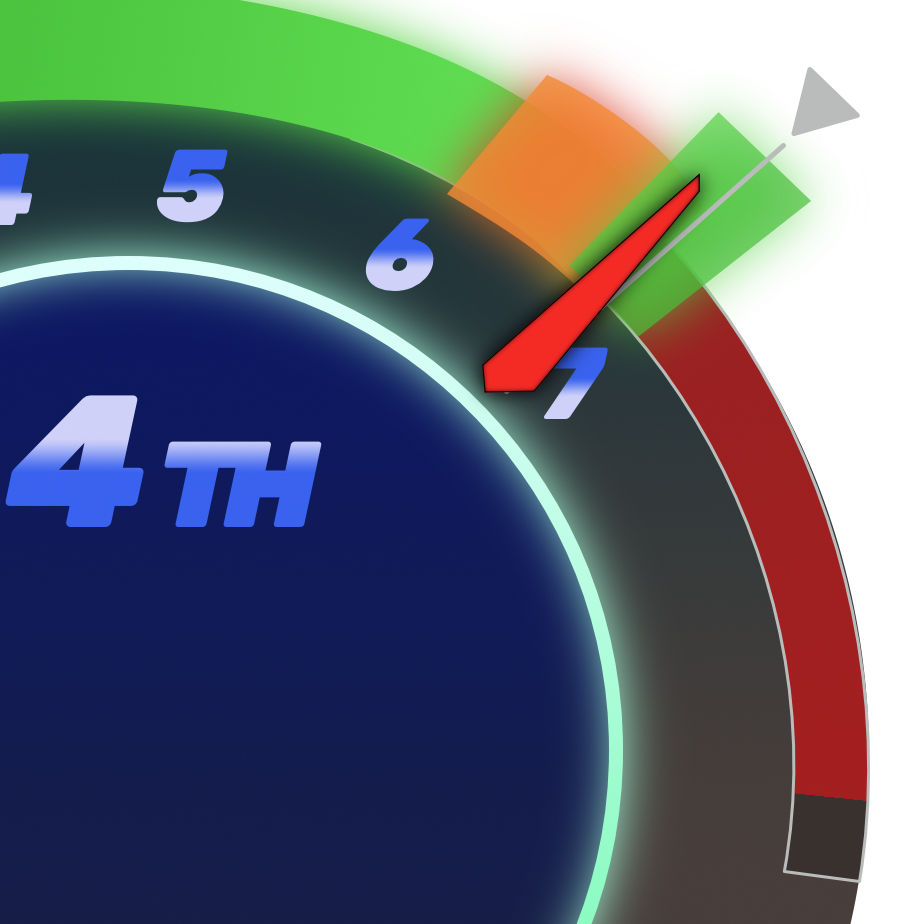
The game makes you think that dancing-the-needle is the strategy here and you sometimes get the perfect start or not. The reality is that there is a better way to get it every single time and that is pushing it to max RPM and leave it there and depending where the green zone is on your car, release it at a fixed point in the countdown. In case of the BMW M5 CS this is where you want to release every single time:


Push it all the way into the red and release shortly before the 1 appears. In the beginning until you really know where that point is release a little early and give it a little whip on the gas if it gets too low before the countdown ends
Shift Pattern For All Tracks With The BMW M5 CS
You got the perfect MOD parts? Check. You know how to do Perfect Launches every time? Check. Now you have to do the best shift patterns on the track and let me tell you always shifting perfect is not cutting it! Just to give you some examples, sometimes you will need to not shift up before a breakpoint, or you will not shift into the highest gear before the finish line and even sometimes there are situations where you will shift down on purpose with certain cars on certain tracks. Sounds a lot? Well, below is the ideal setup for all tracks so you can check it before you start your race:
↙️ Please select your track
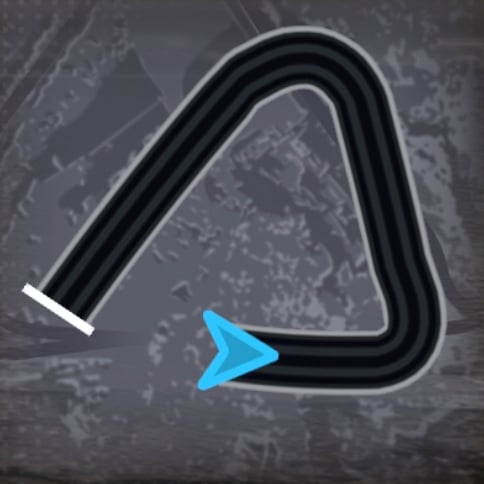
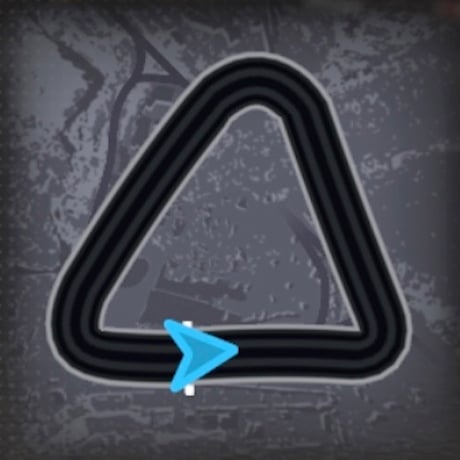
 APEX
APEX
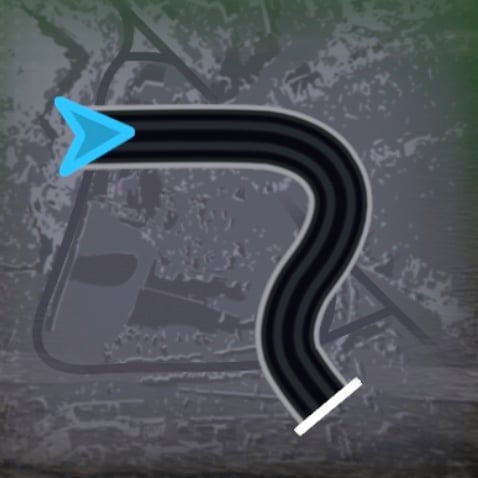
 BAIA
BAIA
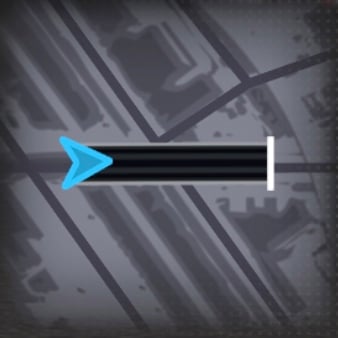
 CHICANE
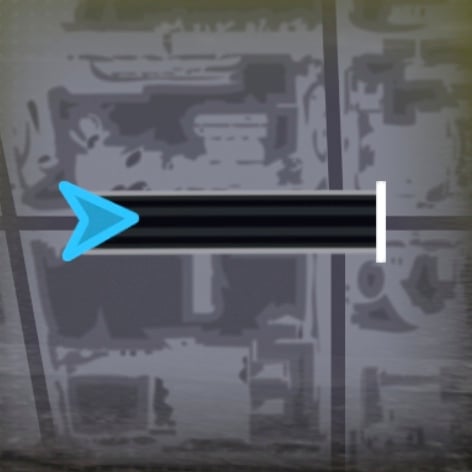
 CLIFFSIDE
 CROSSOVER
 EXPRESSWAY
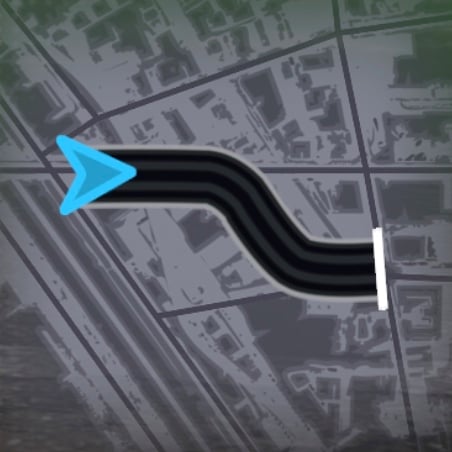
 FONTANA
 GALLERIA
 HEARTLANDS
 HELIX
HELIX
 LABYRINTH
 ODISSEA
 ORBITA
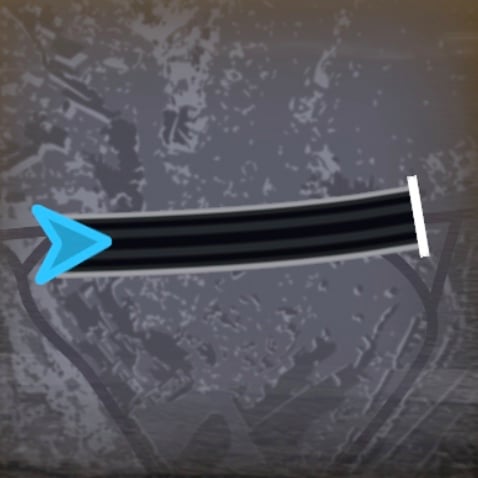
 OUTLANDS
 PACIFICSPRINT
 PAESINO
 RIVIERA
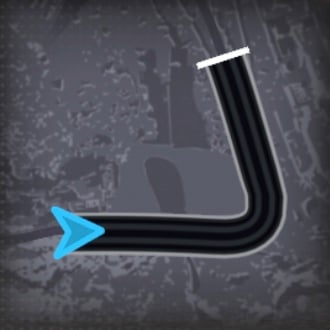
 SKYWAY
 TERRAZA
 SUMMIT

Perfect Start
Push it all the way into the red and release shortly before the 1 appears. In the beginning until you really know where that point is release a little early and give it a little whip on the gas if it gets too low before the countdown ends. Please see the perfect release point above
Perfect into 2nd

Perfect into 3rd
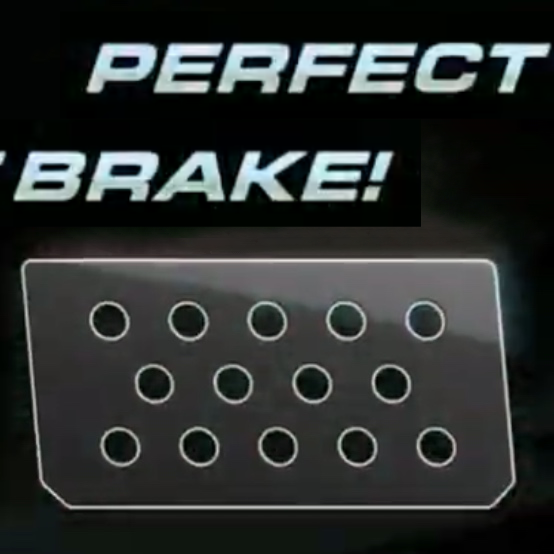
Perfect Break
Up to the turn do perfect shifts into 2nd and 3rd gear. Even if you have Double NOS do not use it here as you either waste it in wheelspin in 1st or breaking into the turn. Just a clean in and out of the turn is what you need

NOS
Perfect into 4th
Perfect into 5th

Finish
Be careful in the turn as the RPM goes fast when you exit to be ready for using your NOS and hitting the perfect spots into 4th and 5th gear Do not shift into 6th gear, finish the race in 5th gear for the best time as the shift will cost you more time than hitting close to max RPM
Perfect Start
Push it all the way into the red and release shortly before the 1 appears. In the beginning until you really know where that point is release a little early and give it a little whip on the gas if it gets too low before the countdown ends. Please see the perfect release point above
Perfect into 2nd
NOS
Perfect into 3rd
Perfect into 4th
Perfect Break
Up to the turn do perfect shifts into 2nd, 3rd and 4th gear. It is close but absolutely go for the 4th gear before the breakpoint as this will make your way through the chicane faster and that is way using NOS here early is so important. In 4th gear you literally can focus on both breakpoints without having to mind anything else while in between the two turns!

Optional NOS (Only With Double NOS)
Finish
If got into 4th gear before the first turn you will not shift down and exit in 4th gear so you push your second NOS if you have Double NOS. If not, there is nothing to do for you here
Perfect Start
Push it all the way into the red and release shortly before the 1 appears. In the beginning until you really know where that point is release a little early and give it a little whip on the gas if it gets too low before the countdown ends. Please see the perfect release point above
Perfect into 2nd
NOS
Perfect into 3rd
Perfect into 4th
Perfect into 5th
Finish
There is nothing special to do on this track other than hitting a perfect start (see above) and then NOS in 2nd gear to avoid wheelspin and hitting it all perfect
Perfect Start
Push it all the way into the red and release shortly before the 1 appears. In the beginning until you really know where that point is release a little early and give it a little whip on the gas if it gets too low before the countdown ends. Please see the perfect release point above
Perfect into 2nd
Optional NOS (Only With Double NOS)
Perfect into 3rd
Perfect into 4th
Perfect Break
Up to the turn do perfect shifts into 2nd, 3rd and 4th gear. If you have the mod part with Double Nitrous Installed use NOS right here in 2nd gear. Attention! Do NOT use NOS if you DO NOT have double NOS! In 4th gear you now have enough time to make the perfect break within the green zone
Perfect into 4th
Perfect Break
Although it seems so tempting in between the turns to use NOS or do something, patience is the key here and shifting perfect into 4th gear is all you will do here before hitting that perfect break again
Perfect into 4th
NOS
Perfect into 5th Gear
Finish
While in the turn your will automatically shift down into 3rd gear so be careful at the exit as RPM will rise quickly to not miss the perfect shift into 4th gear. Now use your NOS. If you have Double NOS this is your 2nd one, if you don't use Double NOS use your main NOS now. Then shift perfectly into 5th gear and do not shift into 6th gear, finish the race in 5th gear for the best time
Perfect Start
Push it all the way into the red and release shortly before the 1 appears. In the beginning until you really know where that point is release a little early and give it a little whip on the gas if it gets too low before the countdown ends. Please see the perfect release point above
Perfect into 2nd
NOS
Perfect into 3rd
Perfect into 4th
Perfect into 5th
Finish
There is nothing special to do on this track other than hitting a perfect start (see above) and then NOS in 2nd gear to avoid wheelspin and hitting it all perfect. Do not shift into 6th gear, by the way, as this will make you a little slower than actually finishing the race in 5th
Perfect Start
Push it all the way into the red and release shortly before the 1 appears. In the beginning until you really know where that point is release a little early and give it a little whip on the gas if it gets too low before the countdown ends. Please see the perfect release point above
Perfect into 2nd
NOS
Perfect into 3rd
Perfect into 4th
Perfect Break
Up to the turn do perfect shifts into 2nd, 3rd and 4th gear. Also use your main NOS here. Getting into 4th gear seems a close call but if you don't you just bump intop max RPM so do the shift and then directly the break
Optional NOS (Only With Double NOS)
Perfect into 4th
Finish
While in the turn your will automatically shift down into 3rd gear so pay close attention to use your NOS if you have the mod part with Double Nitrous Installed use NOS right here at the turn exit in 3rd gear. Then do a perfect shift into 4th and finish the race in 4th gear
Perfect Start
Push it all the way into the red and release shortly before the 1 appears. In the beginning until you really know where that point is release a little early and give it a little whip on the gas if it gets too low before the countdown ends. Please see the perfect release point above
Perfect into 2nd
NOS
Perfect into 3rd
Perfect into 4th
Perfect into 5th
Finish
There is nothing special to do on this track other than hitting a perfect start (see above) and then NOS in 2nd gear to avoid wheelspin and hitting it all perfect. Do not shift into 6th gear, by the way, as this will make you a little slower than actually finishing the race in 5th
Perfect Start
Push it all the way into the red and release shortly before the 1 appears. In the beginning until you really know where that point is release a little early and give it a little whip on the gas if it gets too low before the countdown ends. Please see the perfect release point above
Perfect into 2nd
Optional NOS (Only With Double NOS)
Perfect into 3rd
Perfect into 4th
Perfect Break
Up to the turn do perfect shifts into up into 4th gear. It's close but do NOT shift into 5th before the breaking point and only use NOS if you have Double NOS installed.
NOS
Perfect into 5th
Finish
Once you exit the turn use your main NOS (or Double NOS if you have it) and make the perfect shift into 6th gear. Finish the race in 5th gear although it gets close to save yourself the extra time of that shift right before the finish line
Perfect Start
Push it all the way into the red and release shortly before the 1 appears. In the beginning until you really know where that point is release a little early and give it a little whip on the gas if it gets too low before the countdown ends. Please see the perfect release point above
Perfect into 2nd
Optional NOS (Only With Double NOS)
Perfect into 3rd
Perfect into 4th
Perfect Break
Up to the turn do perfect shifts into 2nd, 3rd and 4th gear. If you have the mod part with Double Nitrous Installed use NOS right here in 2nd gear. Attention! Do NOT use NOS if you DO NOT have double NOS! In 4th gear you now have enough time to make the perfect break within the green zone
Perfect into 4th
NOS
Perfect into 5th
Finish
While in the turn your will automatically shift down into 3rd gear so be careful at the exit as RPM will rise quickly to not miss the perfect shift into 4th gear. Now use your NOS. If you have Double NOS this is your 2nd one, if you don't use Double NOS use your main NOS now as it will go to waste if you use it before the turn. Then shift perfectly into 5th gear and do not shift into 6th gear, finish the race in 5th gear for the best time
Perfect Start
Push it all the way into the red and release shortly before the 1 appears. In the beginning until you really know where that point is release a little early and give it a little whip on the gas if it gets too low before the countdown ends. Please see the perfect release point above
Perfect into 2nd
NOS
Perfect into 3rd
Perfect into 4th
Perfect into 5th
Finish
There is nothing special to do on this track other than hitting a perfect start (see above) and then NOS in 2nd gear to avoid wheelspin and hitting it all perfect. Do not shift into 6th gear, by the way, as this will make you a little slower than actually finishing the race in 5th
Perfect Start
Push it all the way into the red and release shortly before the 1 appears. In the beginning until you really know where that point is release a little early and give it a little whip on the gas if it gets too low before the countdown ends. Please see the perfect release point above
Perfect into 2nd
Perfect into 3rd
Perfect into 4th
Perfect Break
Up to the turn do perfect shifts into 2nd, 3rd and 4th gear. Do not use NOS here, even if you have Double NOS installed as it is better used on the later straights
Perfect into 4th
NOS
Perfect into 5th
Perfect Break
use your Double NOS here right at the exit once you see there is no wheelspin anymore. If you don't have Double NOS simply do your perfect shifts
Optional NOS (Only With Double NOS)
Perfect into 5th

Perfect into 6th
Perfect Break
In the turn you will automatically shift down into 5th and although the last section is longer than the map makes it look like, stay strong here and finish it in
Perfect into 5th
Finish
Although it is just a short straight you still need to get into 5th gear or you will hit max RPM before the finish line
Perfect Start
Push it all the way into the red and release shortly before the 1 appears. In the beginning until you really know where that point is release a little early and give it a little whip on the gas if it gets too low before the countdown ends. Please see the perfect release point above
Perfect into 2nd
NOS
Perfect into 3rd
Perfect into 4th
Perfect Break
Up to the turn do perfect shifts into 2nd, 3rd and 4th gear. If you have Double NOS use your first one in this section, if not use your Main NOS here to get going quickly. Since the runway is slightly shorter here compared to other tracks do not get into 4th gear but break into the turn before that
Perfect into 4th
Optional NOS (Only With Double NOS)
Perfect into 5th
Perfect Break
In the turn you will automatically shift down into 3rd so push fast out of there and don't miss the perfect shift. Use your second NOS as well if you have Double NOS installed. Also get into 5tth gear before the turn, this will help you with the upcoming straight
Perfect into 5th
Perfect Break
In the turn you will automatically shift down into 4th so push fast out of there and don't miss the perfect shift into 5th and prepare for the last turn
Perfect into 5th
Finish
Although it is just a short straight you still need to get into 5th gear or you will hit max RPM before the finish line
Perfect Start
Push it all the way into the red and release shortly before the 1 appears. In the beginning until you really know where that point is release a little early and give it a little whip on the gas if it gets too low before the countdown ends. Please see the perfect release point above
Perfect into 2nd
NOS
Perfect into 3rd
Perfect into 4th
Perfect into 5th
Perfect Break
Up to the turn do perfect shifts into up into 5th gear right before the turn starts. Use you main NOS as well here to get up to speed
Optional NOS (Only With Double NOS)
Perfect into 5th
Finish
You will automatically shift down into 4th gear i the turn so use you Double NOS at the exit if you have it and do the perfect shift into 5th gear right before the finish line for the best time
Perfect Start
Push it all the way into the red and release shortly before the 1 appears. In the beginning until you really know where that point is release a little early and give it a little whip on the gas if it gets too low before the countdown ends. Please see the perfect release point above
Perfect into 2nd
NOS
Perfect into 3rd
Perfect into 4th
Perfect Break
Up to the turn do perfect shifts into 2nd, 3rd and 4th gear. If you have Double NOS use your first one in this section, if not use your Main NOS here to get going quickly. In 4th gear you now have enough time to make the perfect break within the green zone
Optional NOS (Only With Double NOS)
Perfect into 4th
Perfect Break
In the turn you will automatically shift down into 3rd so push fast out of there and don't miss the perfect shift. Use your second NOS as well if you have Double NOS installed. Do not get into 5th gear even if it goes close with breaking into the next turn
Perfect into 4th
Finish
While in the turn your will automatically shift down into 3rd gear so be careful at the exit as RPM will rise quickly to not miss the perfect shift into 4th gear. The last section towards the finish line is short but do shift into 4th gear still as you come out hot in the turn to finish the race
Perfect Start
Push it all the way into the red and release shortly before the 1 appears. In the beginning until you really know where that point is release a little early and give it a little whip on the gas if it gets too low before the countdown ends. Please see the perfect release point above
Perfect into 2nd
NOS
Perfect into 3rd
Perfect into 4th
Perfect Break
Up to the turn do perfect shifts into 2nd, 3rd and 4th gear. If you have Double NOS use your first one in this section, if not use your Main NOS here to get going quickly. Although you might be able to go into 5th gear before the breaking point, stick to 4th as it gives you a better turn speed
Optional NOS (Only With Double NOS)
Perfect into 5th
Finish
As in 4th gear you stick there, you will be able to get into 5th gear comfortable on exit of the turn. If you have Double NOS installed use it as soon as you exit the turn as well
Perfect Start
Push it all the way into the red and release shortly before the 1 appears. In the beginning until you really know where that point is release a little early and give it a little whip on the gas if it gets too low before the countdown ends. Please see the perfect release point above
Perfect into 2nd
NOS
Perfect into 3rd
Perfect into 4th
Perfect into 5th
Finish
There is nothing special to do on this track other than hitting a perfect start (see above) and then NOS in 2nd gear to avoid wheelspin and hitting it all perfect
Perfect Start
Push it all the way into the red and release shortly before the 1 appears. In the beginning until you really know where that point is release a little early and give it a little whip on the gas if it gets too low before the countdown ends. Please see the perfect release point above
Perfect into 2nd
NOS
Perfect into 3rd
Perfect into 4th
Perfect Break
Up to the turn do perfect shifts into 2nd, 3rd and 4th gear. If you have Double NOS use your first one in this section, if not use your Main NOS here to get going quickly. In 4th gear you now have enough time to make the perfect break within the green zone
Optional NOS (Only With Double NOS)
Perfect into 4th
Perfect Break
In the turn you will automatically shift down into 3rd so push fast out of there and don't miss the perfect shift. Use your second NOS as well if you have Double NOS installed. Do not get into 5th gear even if it goes close with breaking into the next turn
Perfect into 4th
Finish
While in the turn your will automatically shift down into 3rd gear so be careful at the exit as RPM will rise quickly to not miss the perfect shift into 4th gear. The last section towards the finish line is short but do shift into 4th gear still as you come out hot in the turn to finish the race
Perfect Start
Push it all the way into the red and release shortly before the 1 appears. In the beginning until you really know where that point is release a little early and give it a little whip on the gas if it gets too low before the countdown ends. Please see the perfect release point above
Perfect into 2nd
NOS
Perfect into 3rd
Perfect into 4th
Finish
The shortes straight on the track so you have an issue with late NOS or wheelspin but you have to get everything on track as fast as possible. Still, fire NOS in 1st here is a mistake as wheelspin just gets worst but as soon as you hit it into 2nd, NOS all the way
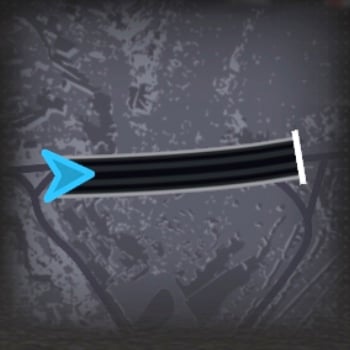
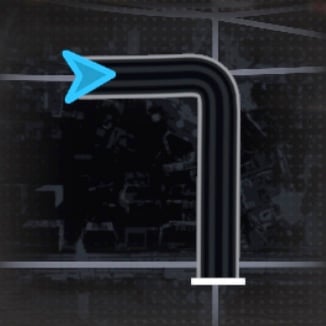
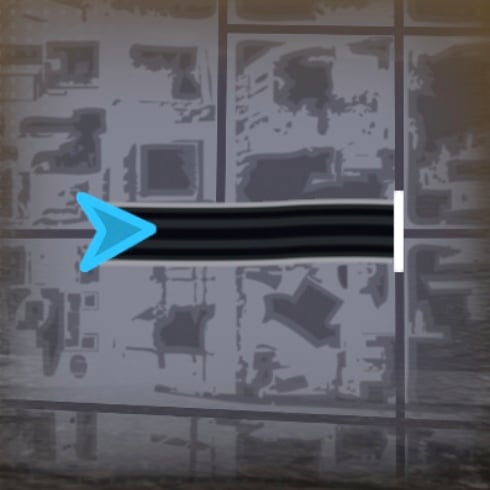
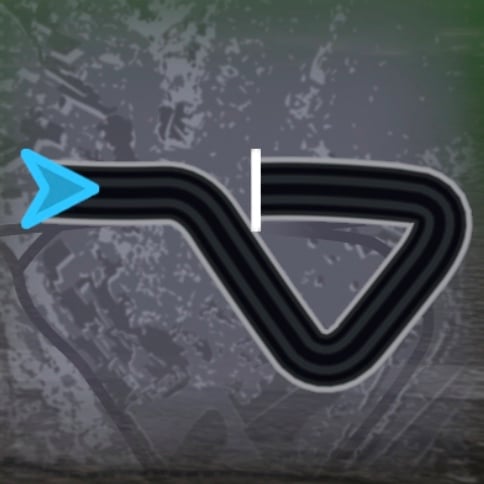
How to read the shift pattern: In the red big boxes you see always the start finish and turns. In between in the smaller boxes with the shift indicator you see what gears to use and in what gears to use your NOS.
We hope this overview helps you and we always optimize and perfect our setups and add more tracks when added – if you find some better tune or MOD part for a car, please drop a comment and we’re more than happy to take a look at it.